Film Riot

5 Shot Types Every Filmmaker Should Know

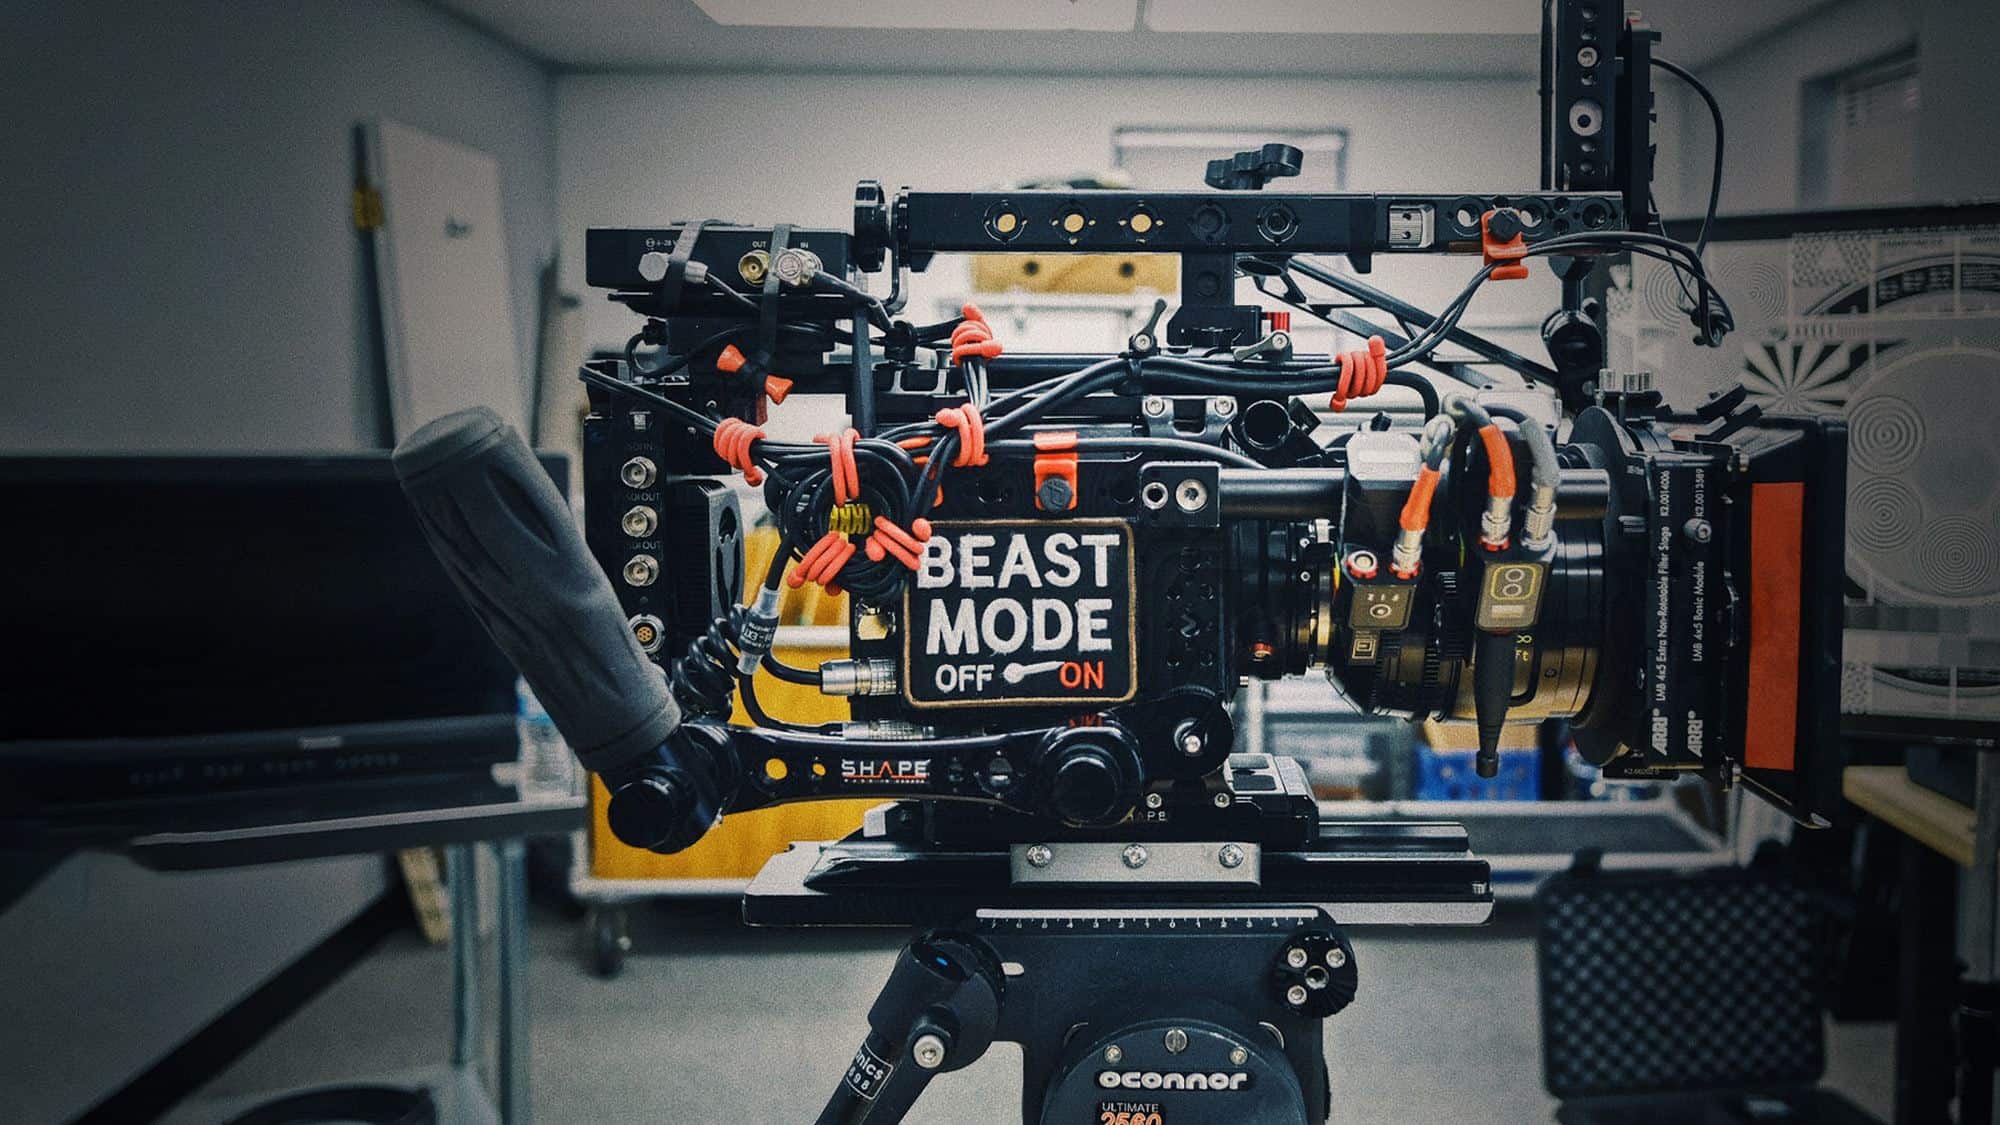
For over a decade, Film Riot has been dedicated to helping aspiring filmmakers learn about all the tips and tricks that make Hollywood movies “tick.” But as every good filmmaker knows, understanding the foundational basics is paramount if you want to be successful at telling stories with the moving image. That includes understanding shot types in filmmaking.

The next few episodes of Film Riot will cover some of those basics. First up is: Shot Types.

The 5 Shot Types in Filmmaking

In this series, Ryan uses the metaphor of writing a sentence to describe filmmaking. Shots are the words, coverage would be the collection of words to form that sentence, and editing is the arrangement of those words to form your sentence. In this episode, Ryan covers five shot types:

  1. Shot Size
  2. Angle
  3. Framing
  4. Movement
  5. Focal Length

Shot Size

The shot types Ryan covers are not entirely exhaustive, but they cover the basics.

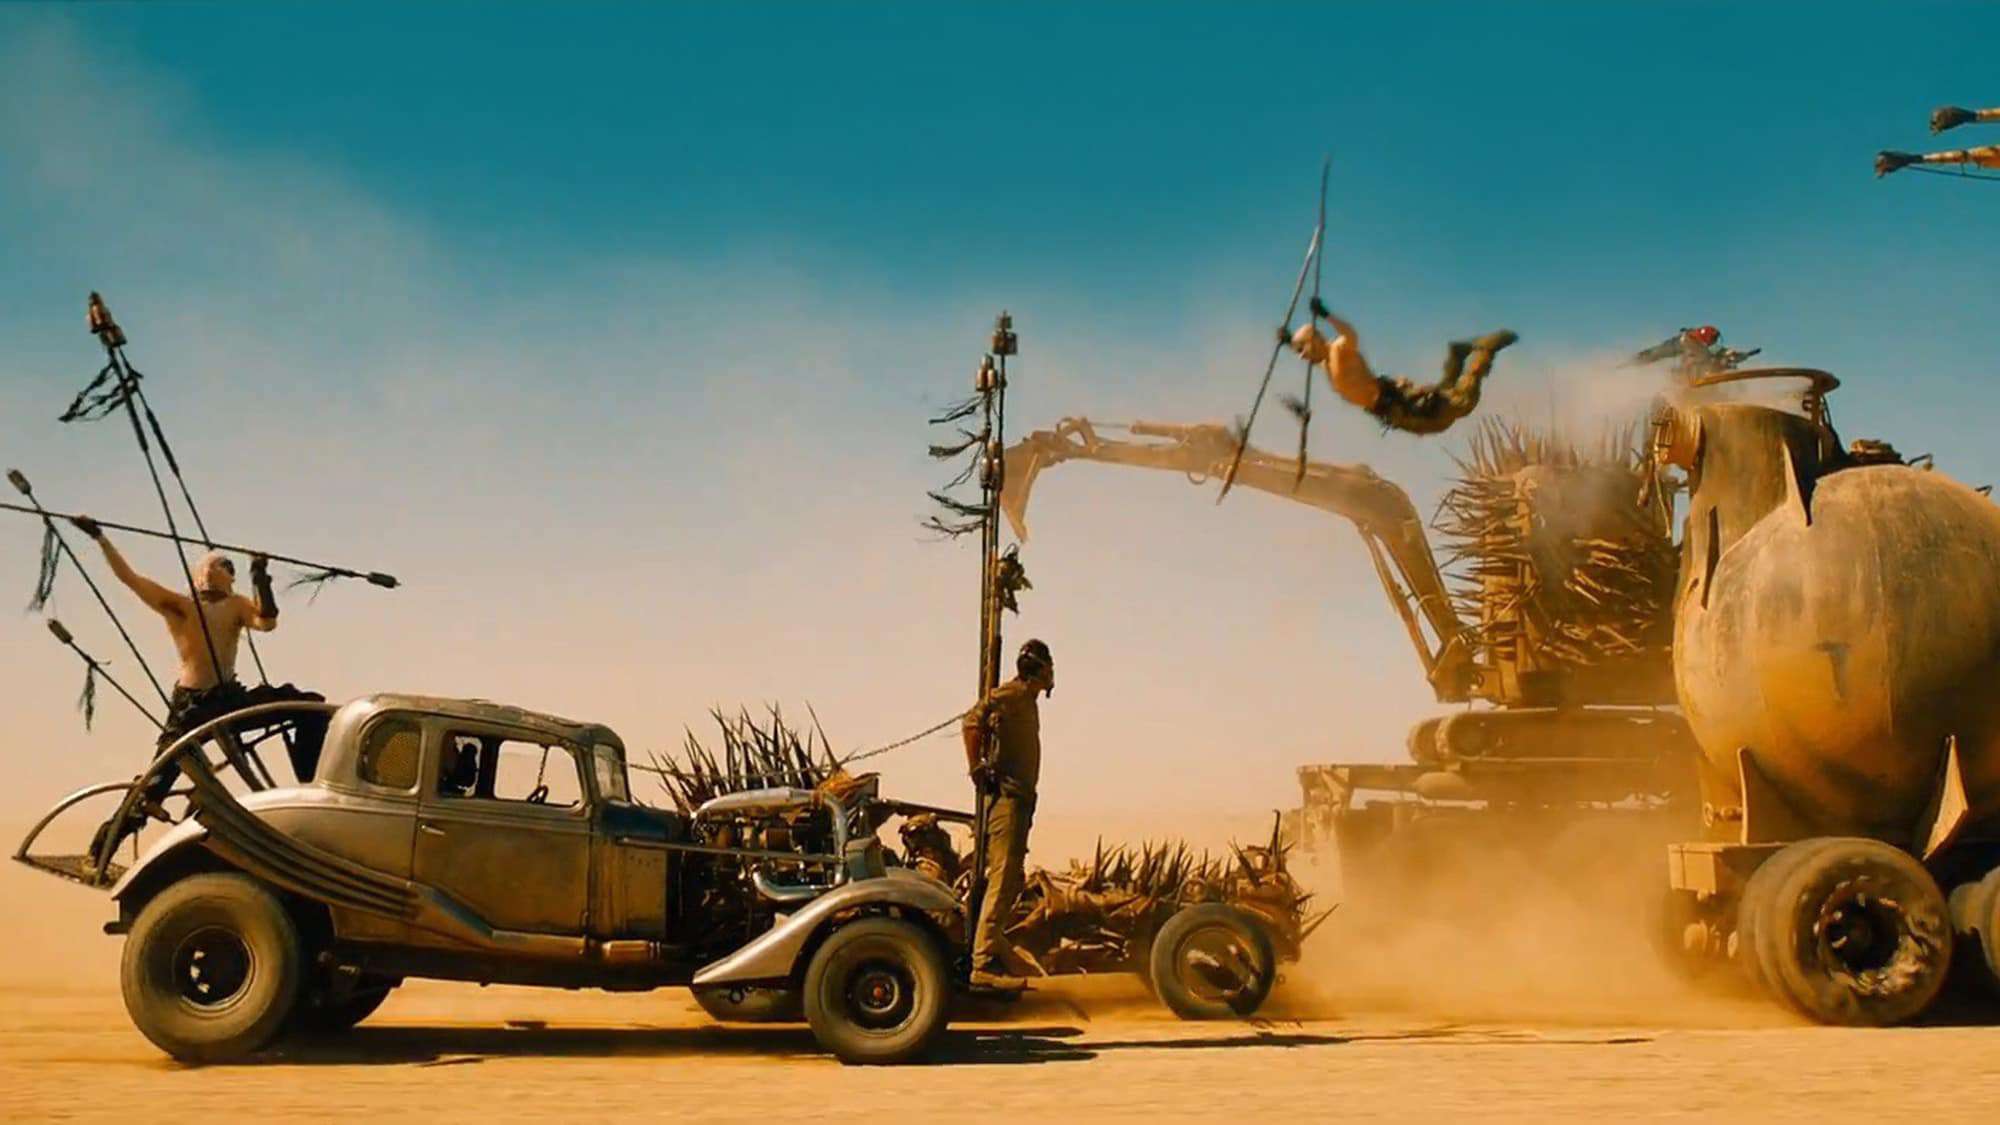
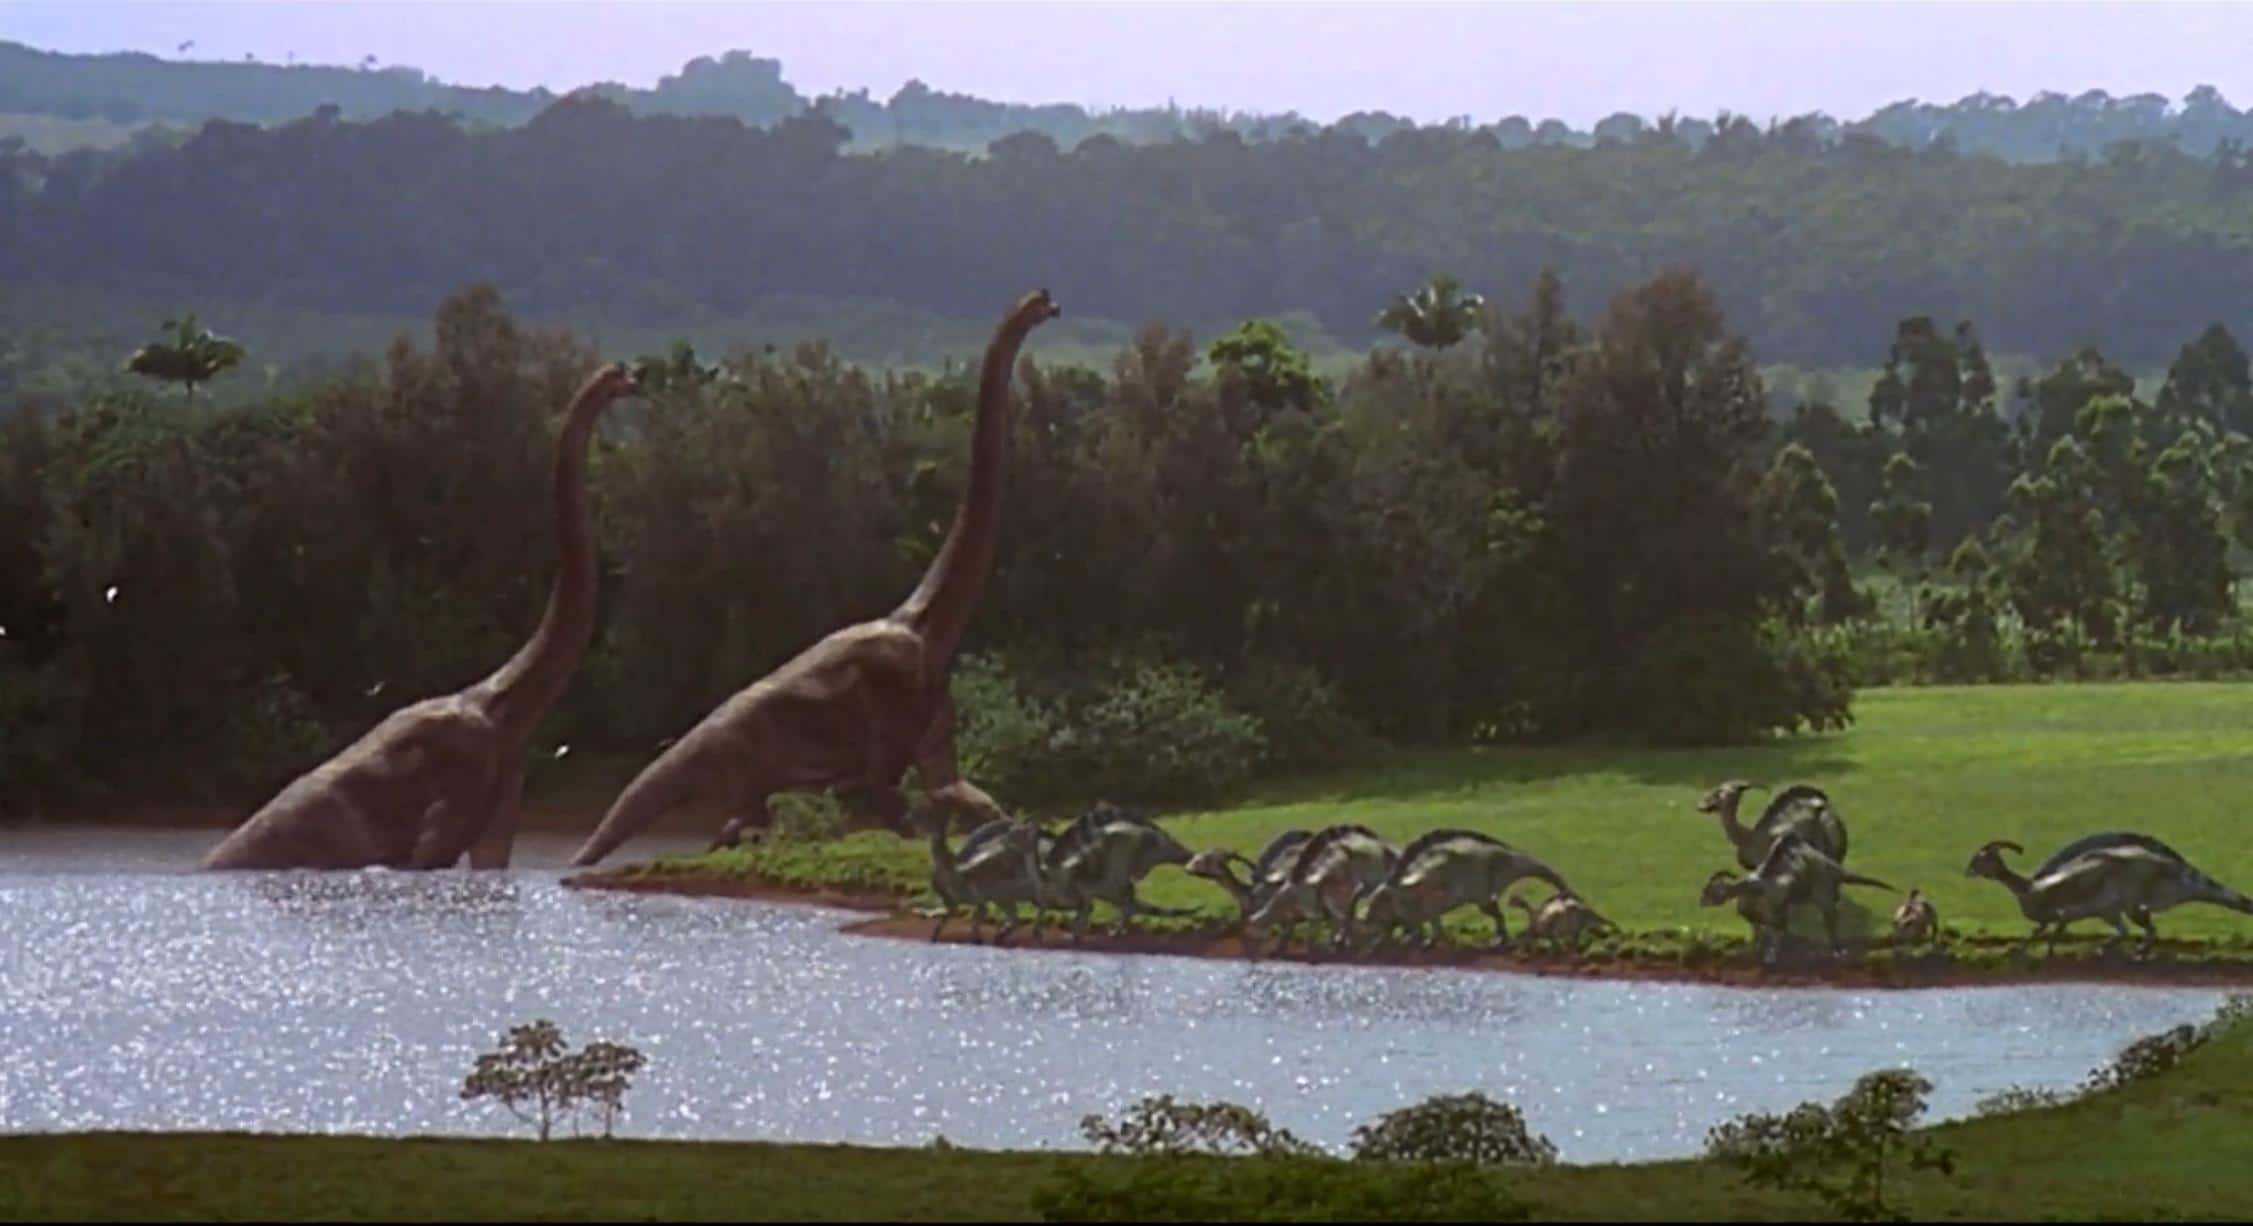
Extreme Wide Shot (EWS): a shot far from the subject that takes in the entirety of the area. Think of shots like a spaceship arriving to a planet; or the entirety of a castle and the large army arriving to sack it.

Extreme Wide Shot - Blade Runner 2049

Wide Shot (WS): the subject is now in focus but they’re not filling the frame..

Wide Shot - Blade Runner 2049

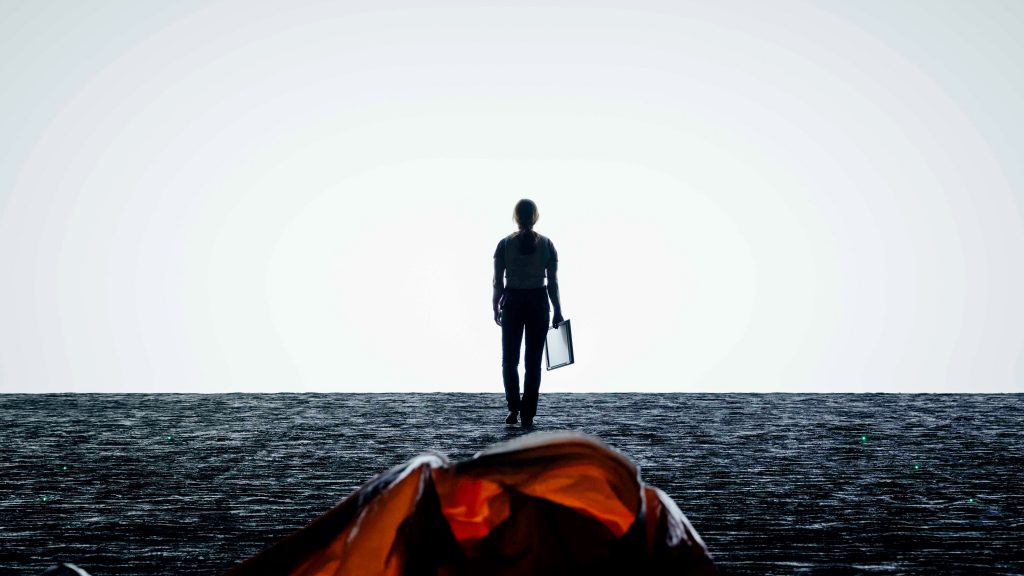
Full Shot (FS): a wide shot where your subject fills the frame, head to toe.

Full Shot - Western

Medium Wide Shot (MWS): a “full shot” that is a bit closer such that the subject’s head and/or feet are cut off.

Medium Wide Shot - Bobby De Niro

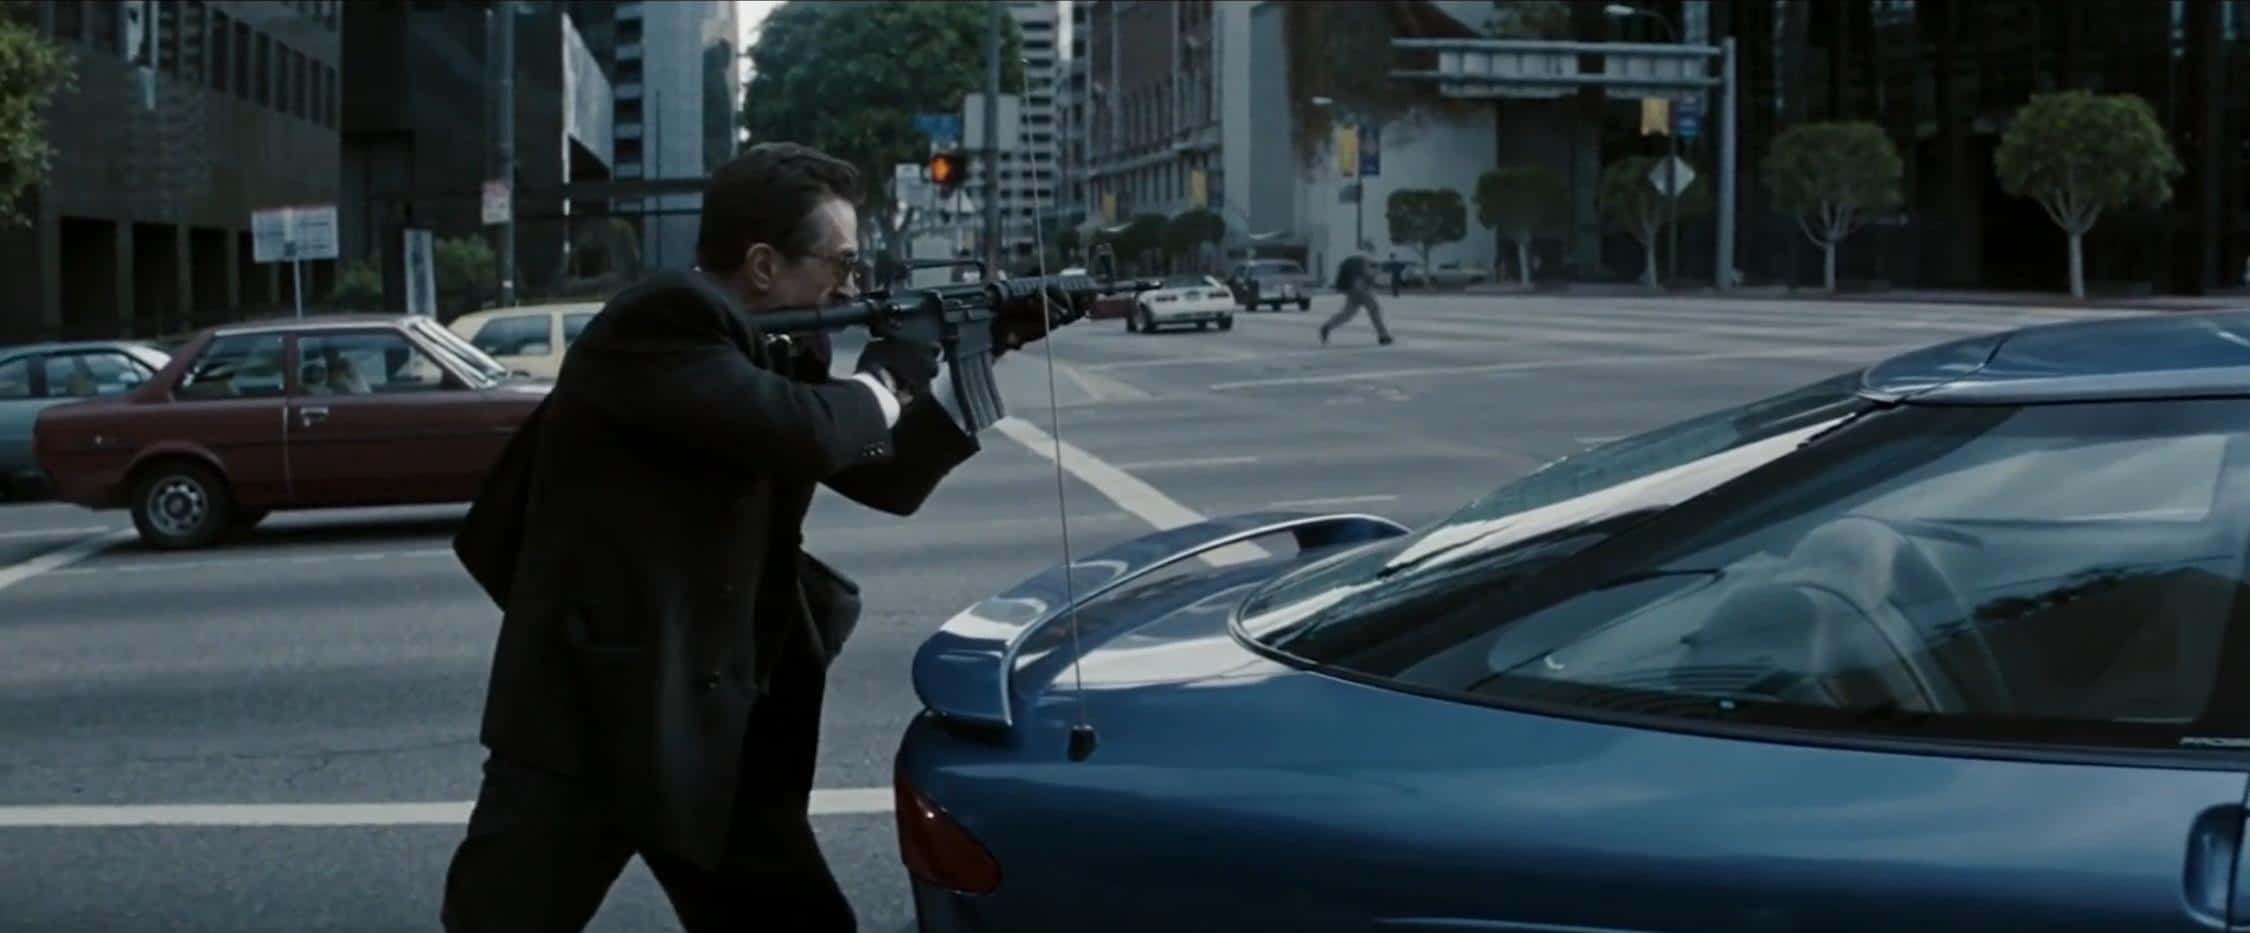
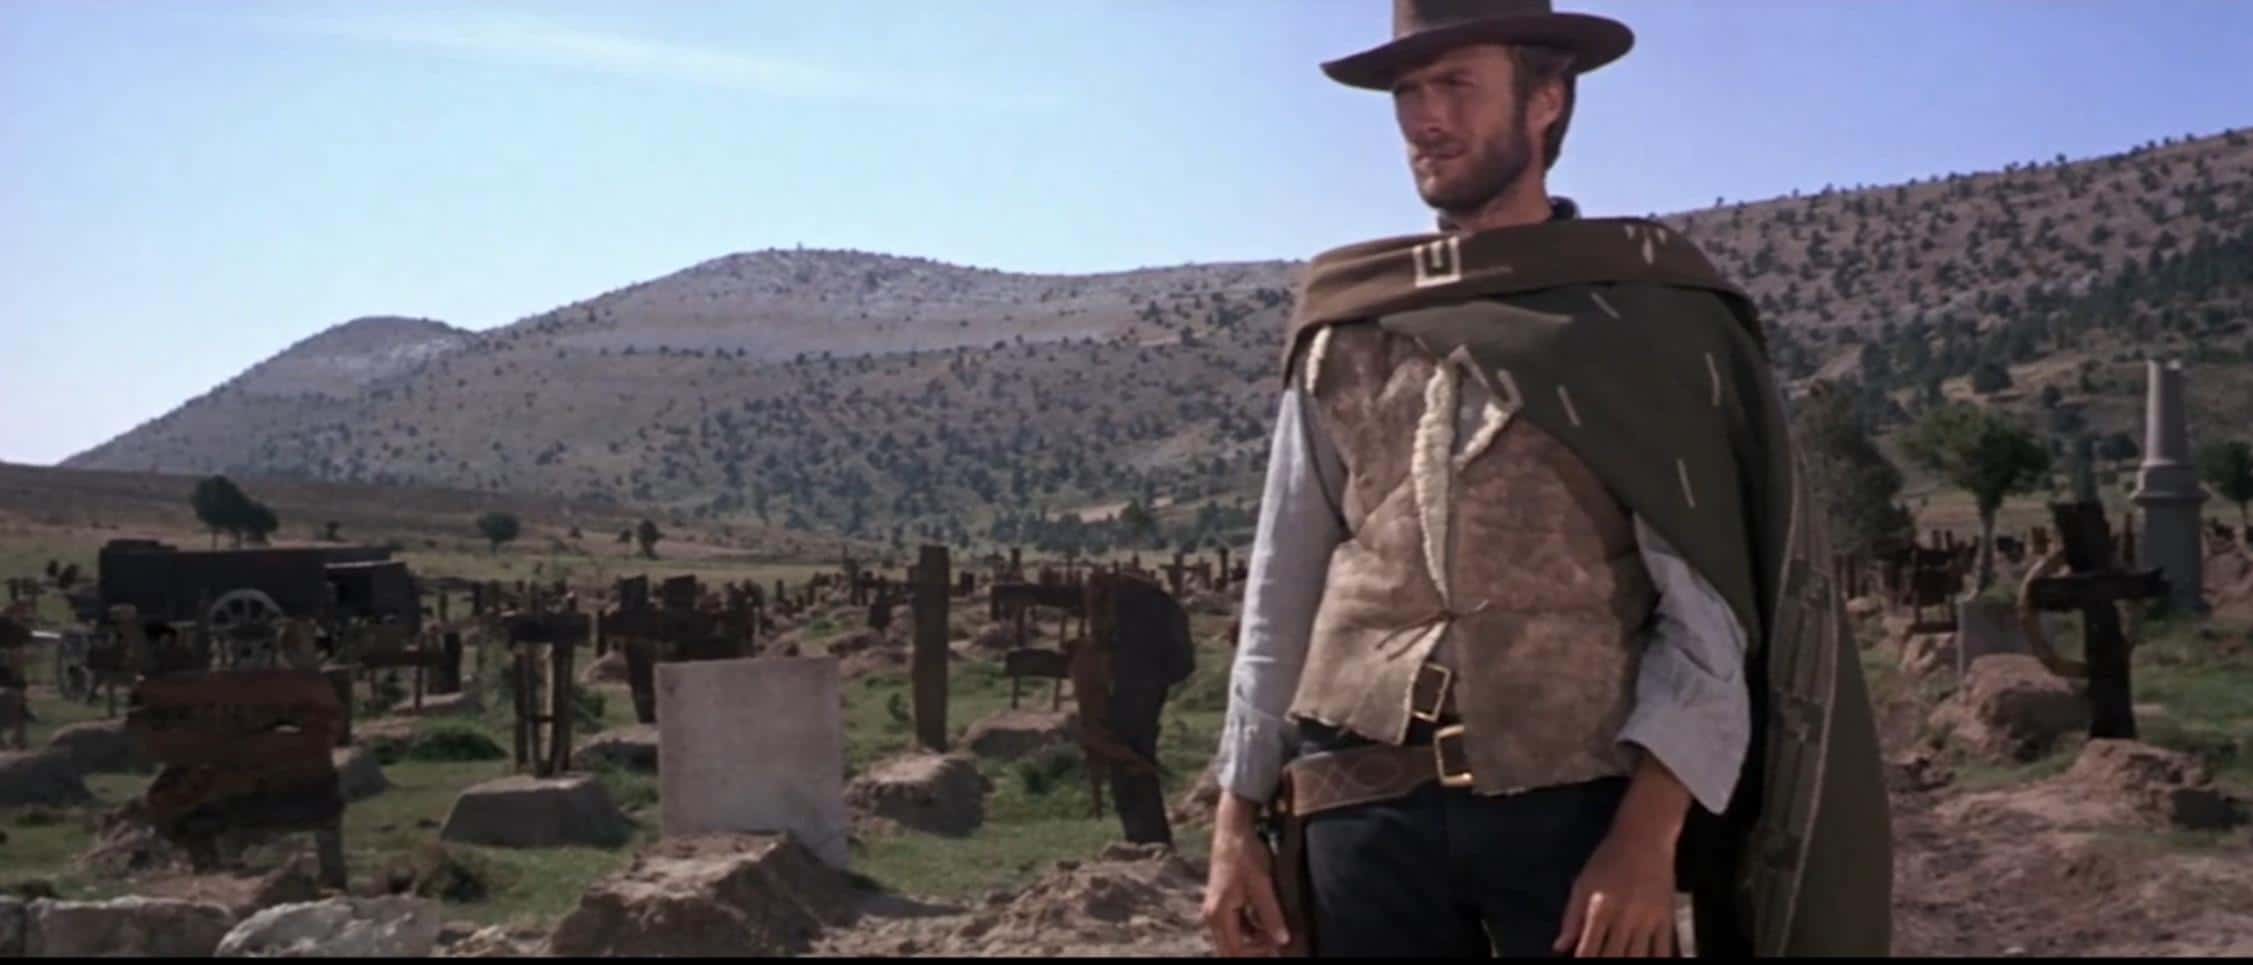
The “Cowboy Shot”: this is a version of the MWS that is called “the Cowboy” because the shot is cut off right where the person’s gun and holster would be.

Cowboy Shot - Clint Eastwood

Medium Shot (MS): the subject is framed from the hips up.

Medium Shot - Tom Cruise

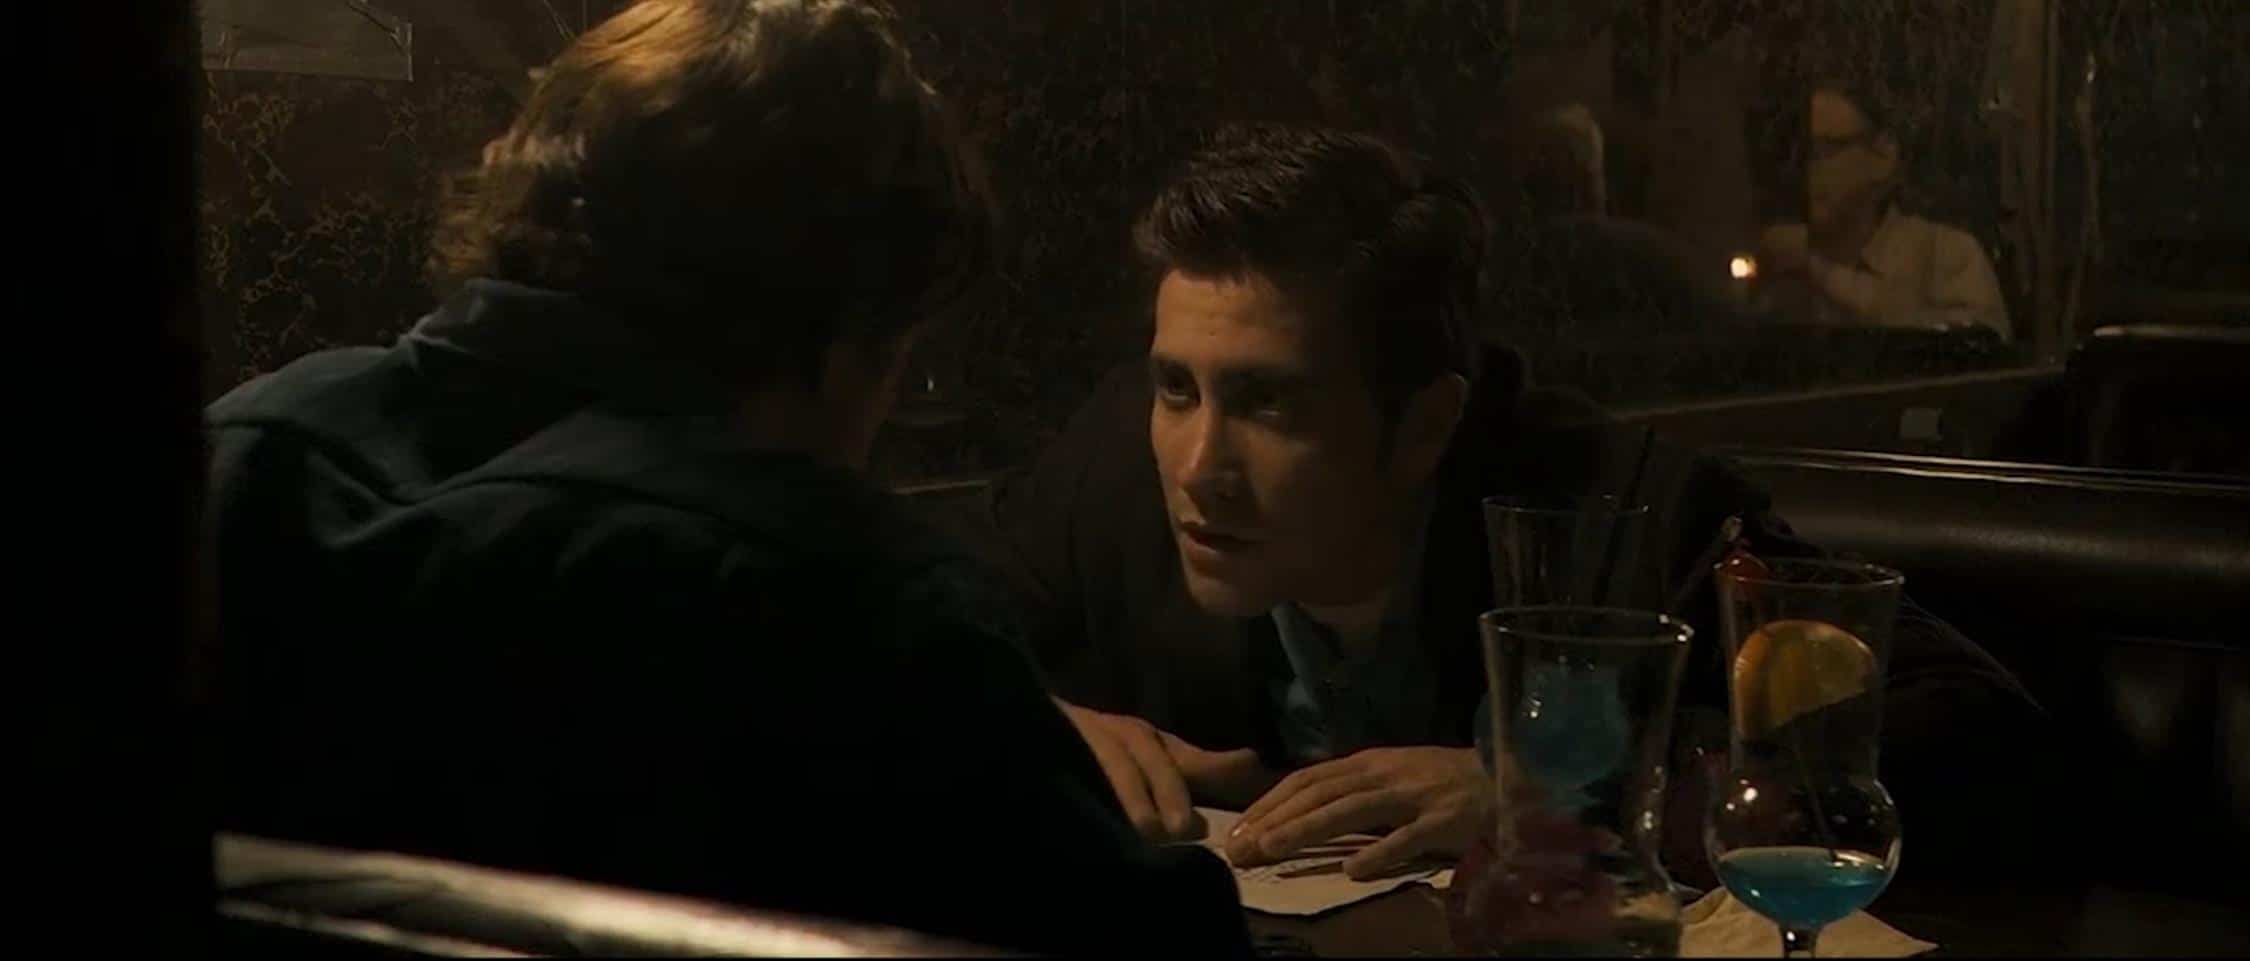
Medium Close-up (MCU): the framing is chest up. At this distance we can see the eyes more clearly, making the shot a lot more intimate. Many dialog scenes are shot with MCUs.

Medium Close Up

Close-up (CU): the subject fills the frame top to bottom. It is used sparingly and is often on people’s faces, but it doesn’t have to be. It can be that of a hand or prop.

Close-up - Gone Girl

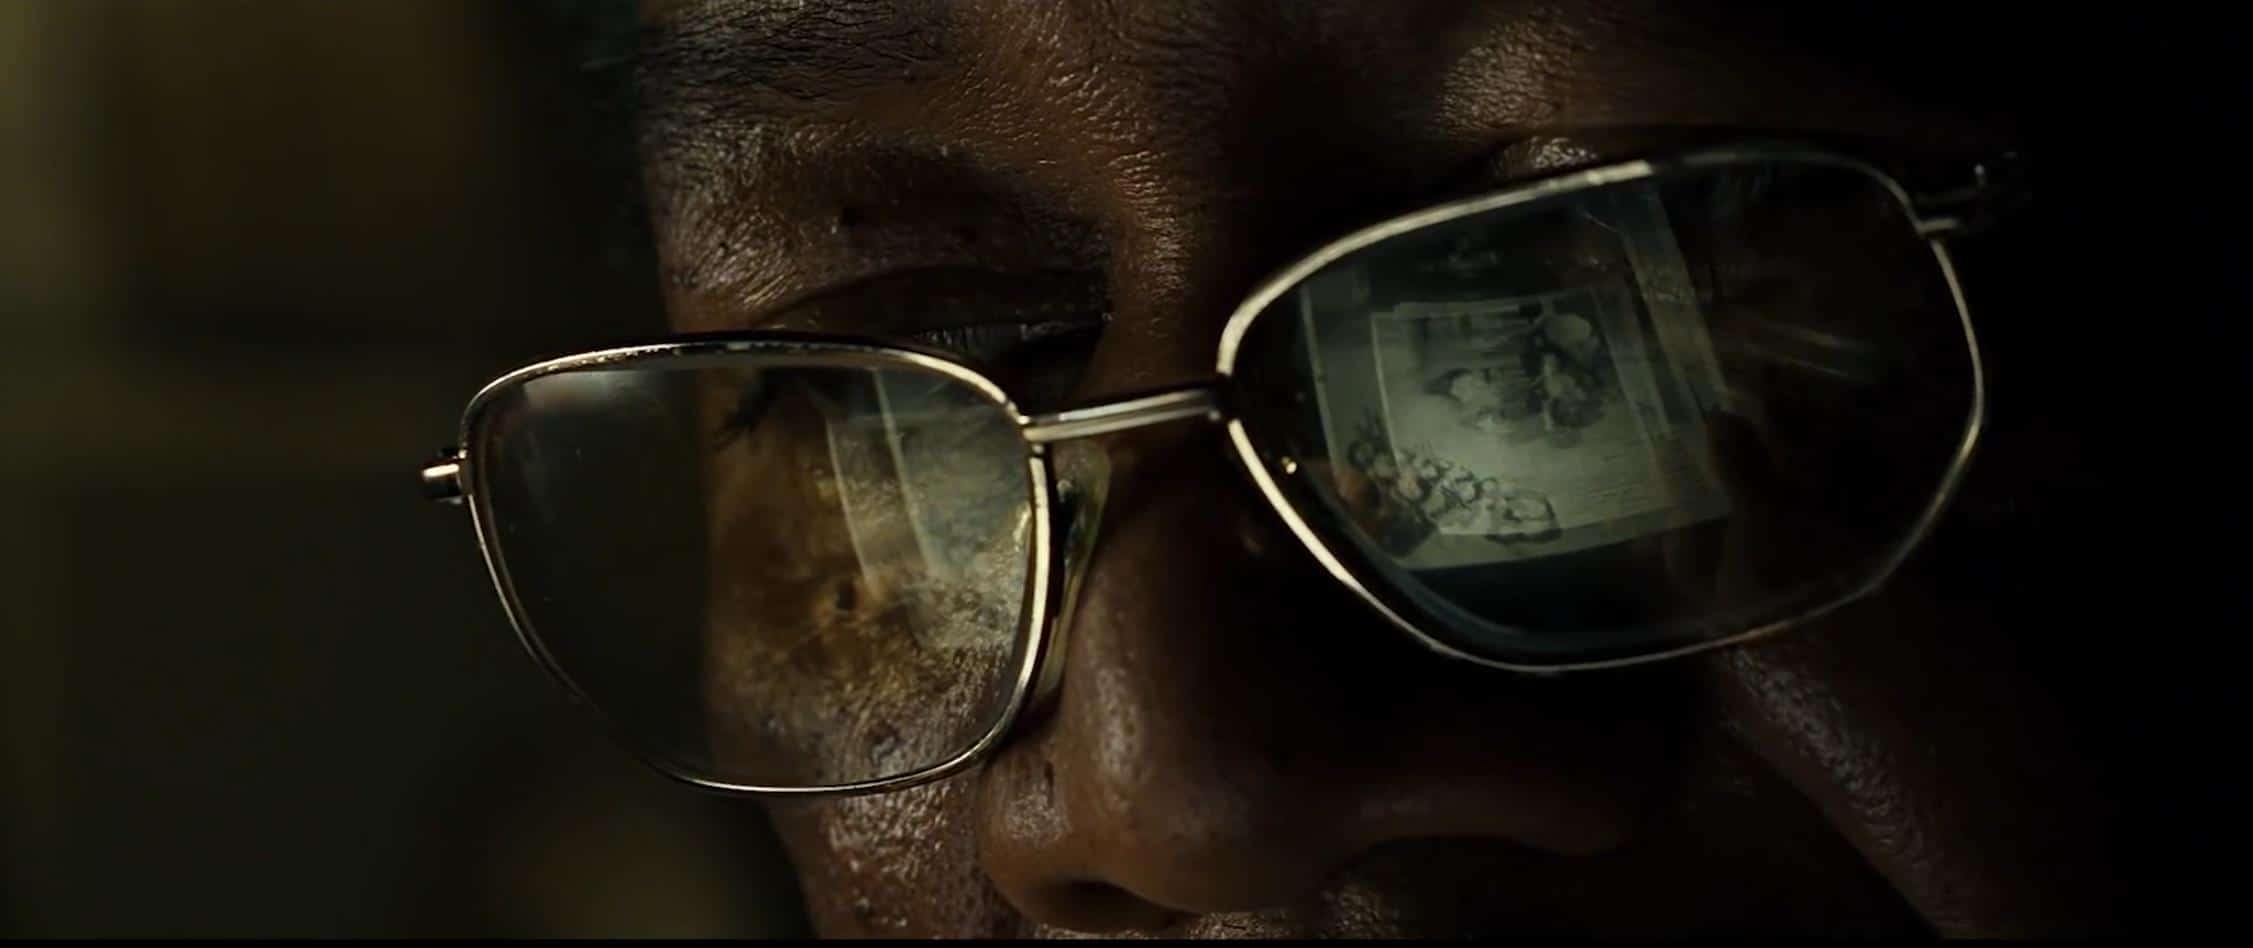
Extreme Close-up (ECU): an even closer (tighter) shot, often of a subject’s eyes or mouth. One of Ryan’s faves is this shot from “Se7en” where you can see Morgan Freeman’s eyes, as well as the reflection of the paper in his glasses.

Extreme Close-up - "Seven"

Angle

This is the position of your camera relative to the subject in question.

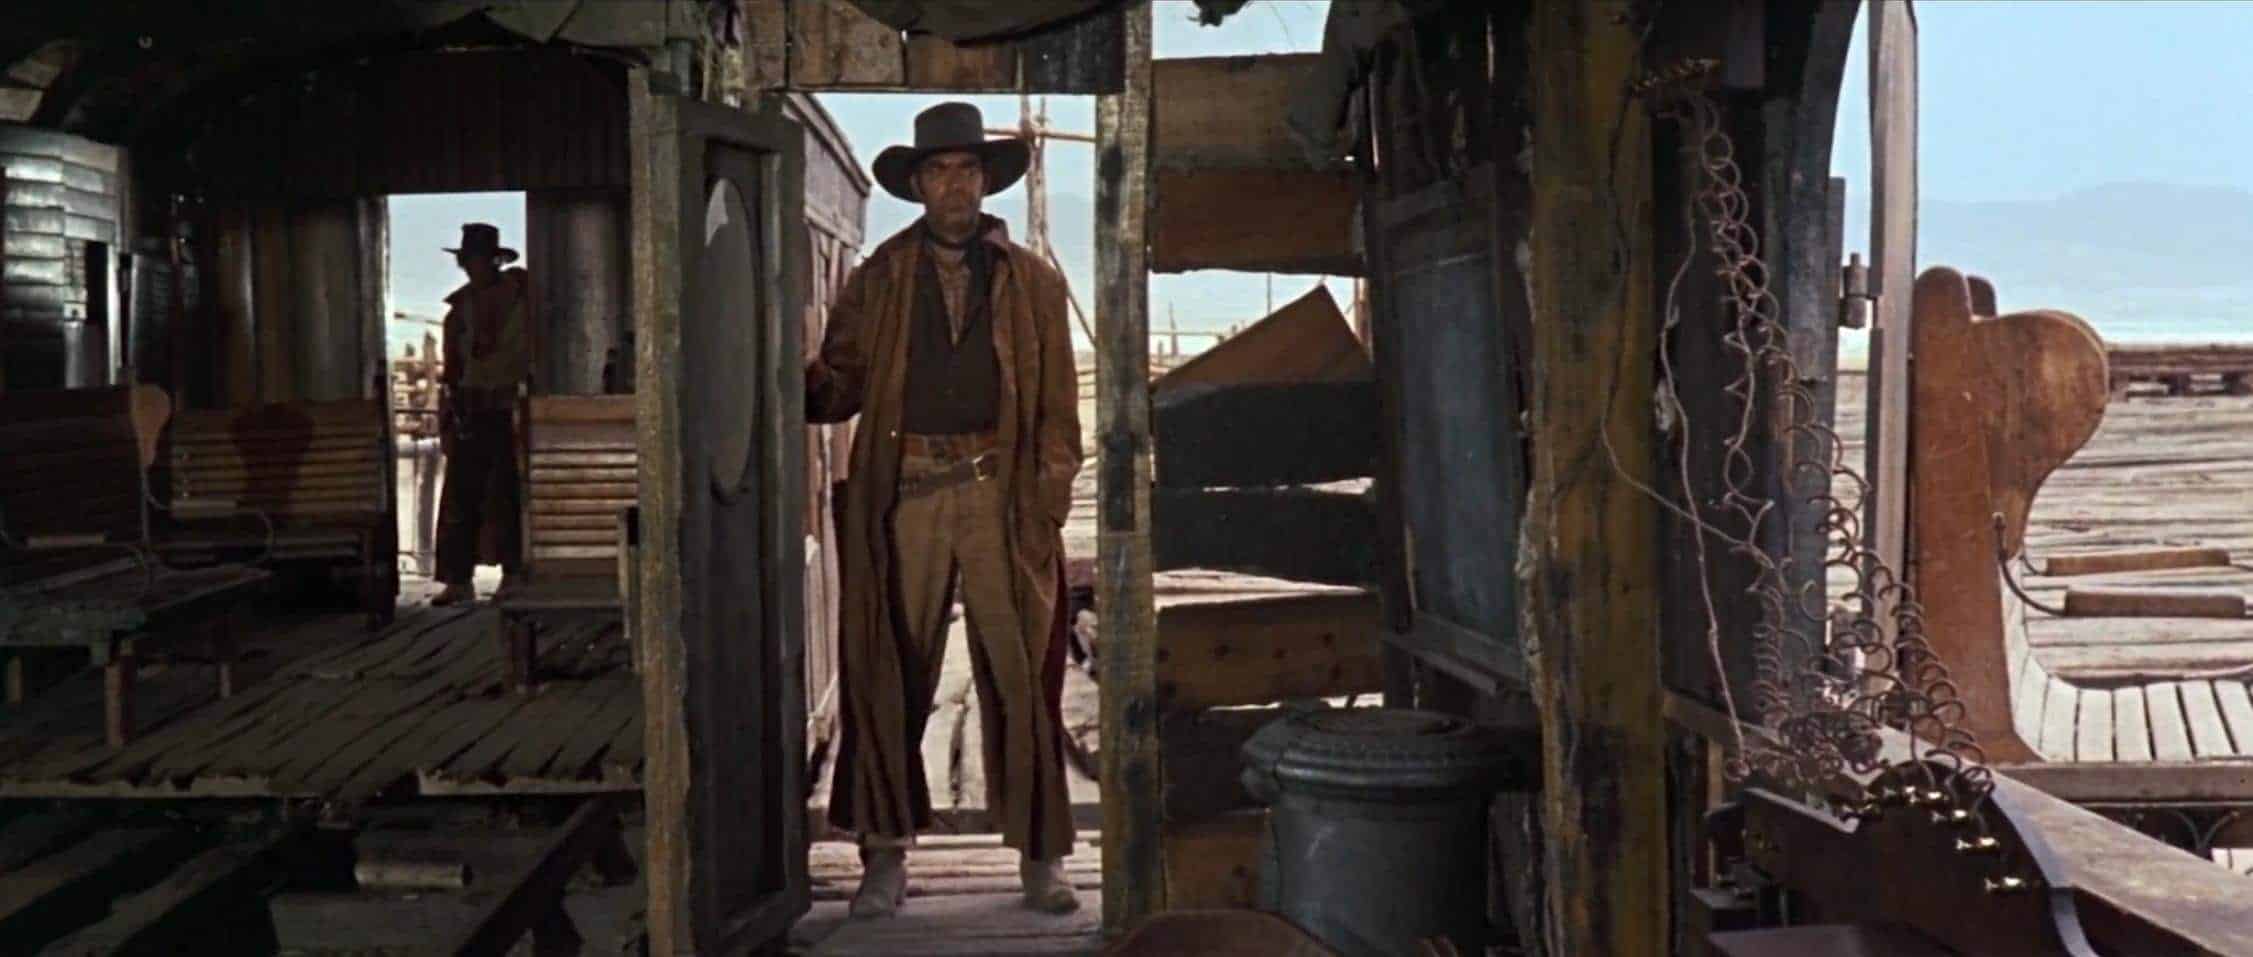
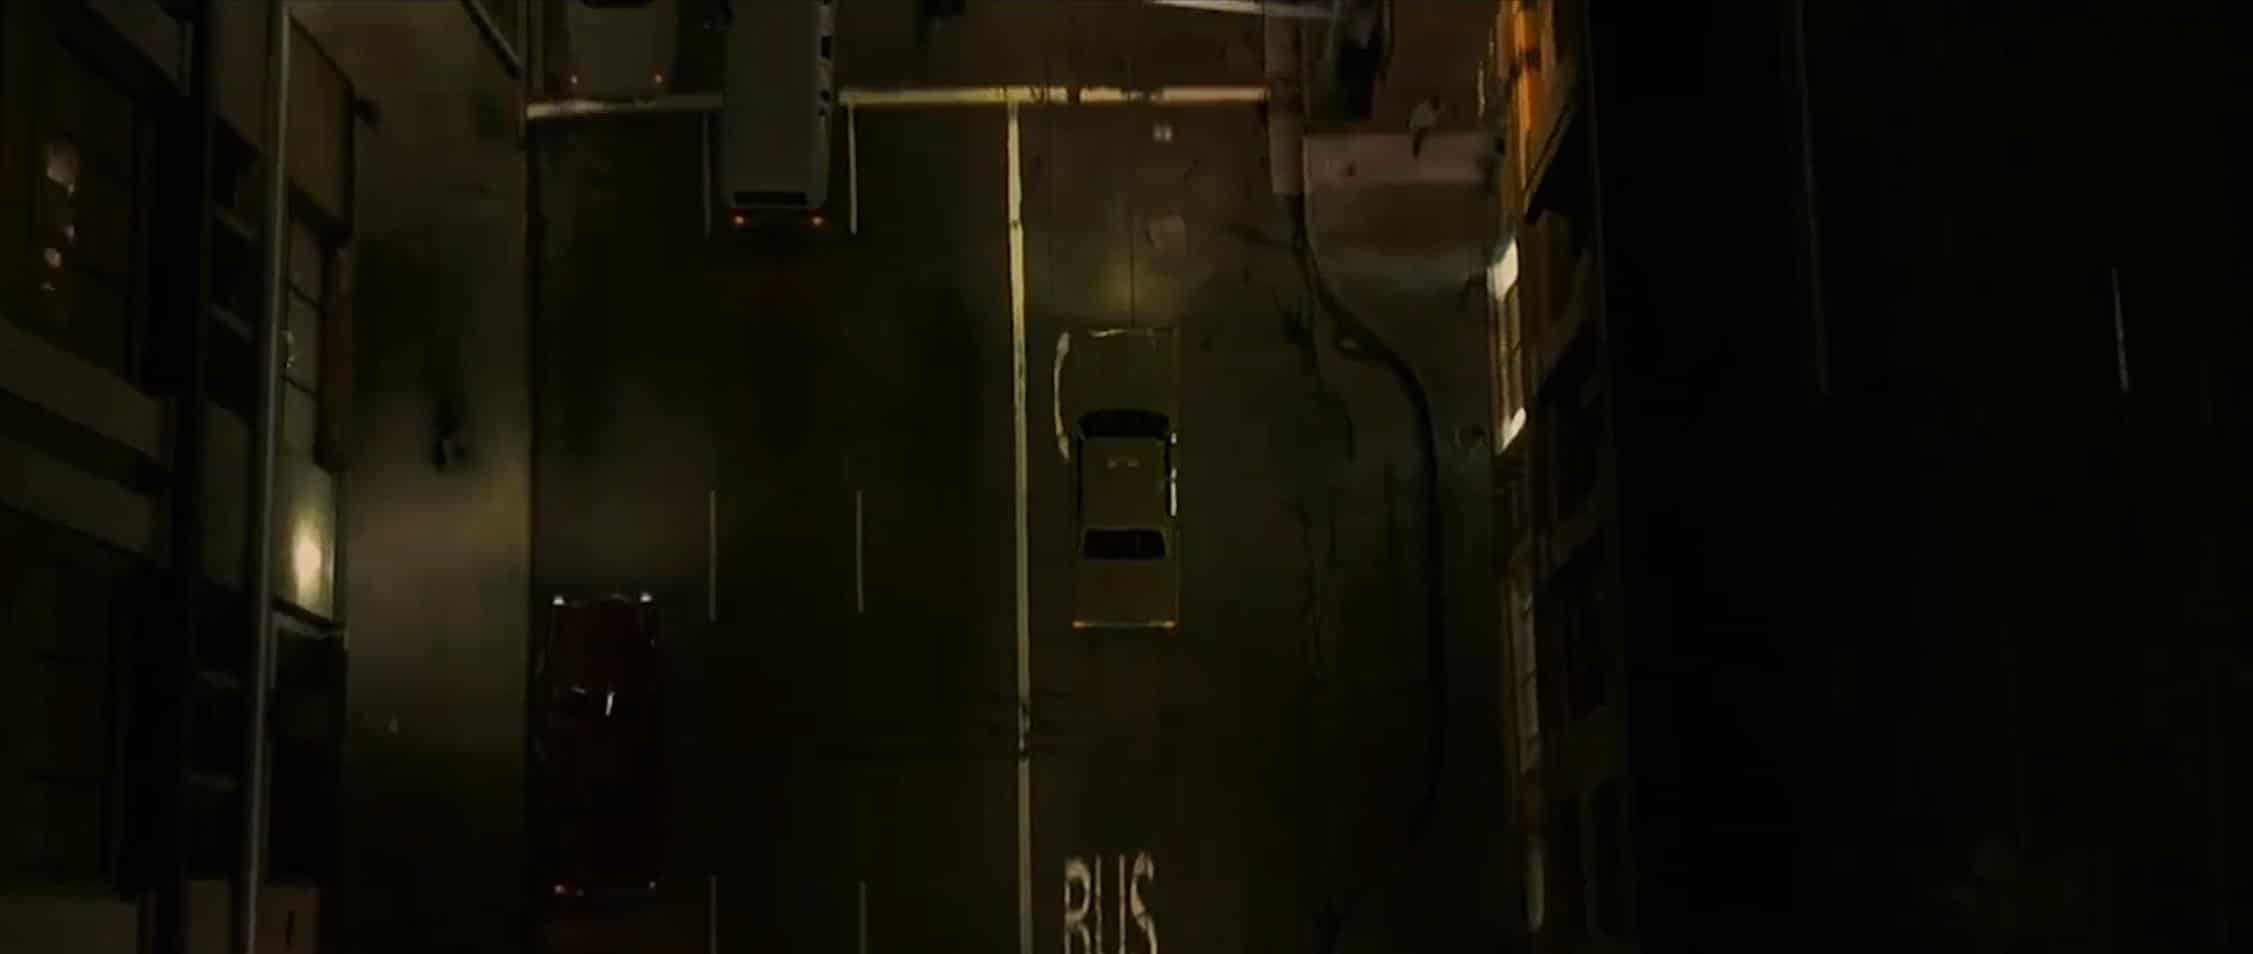
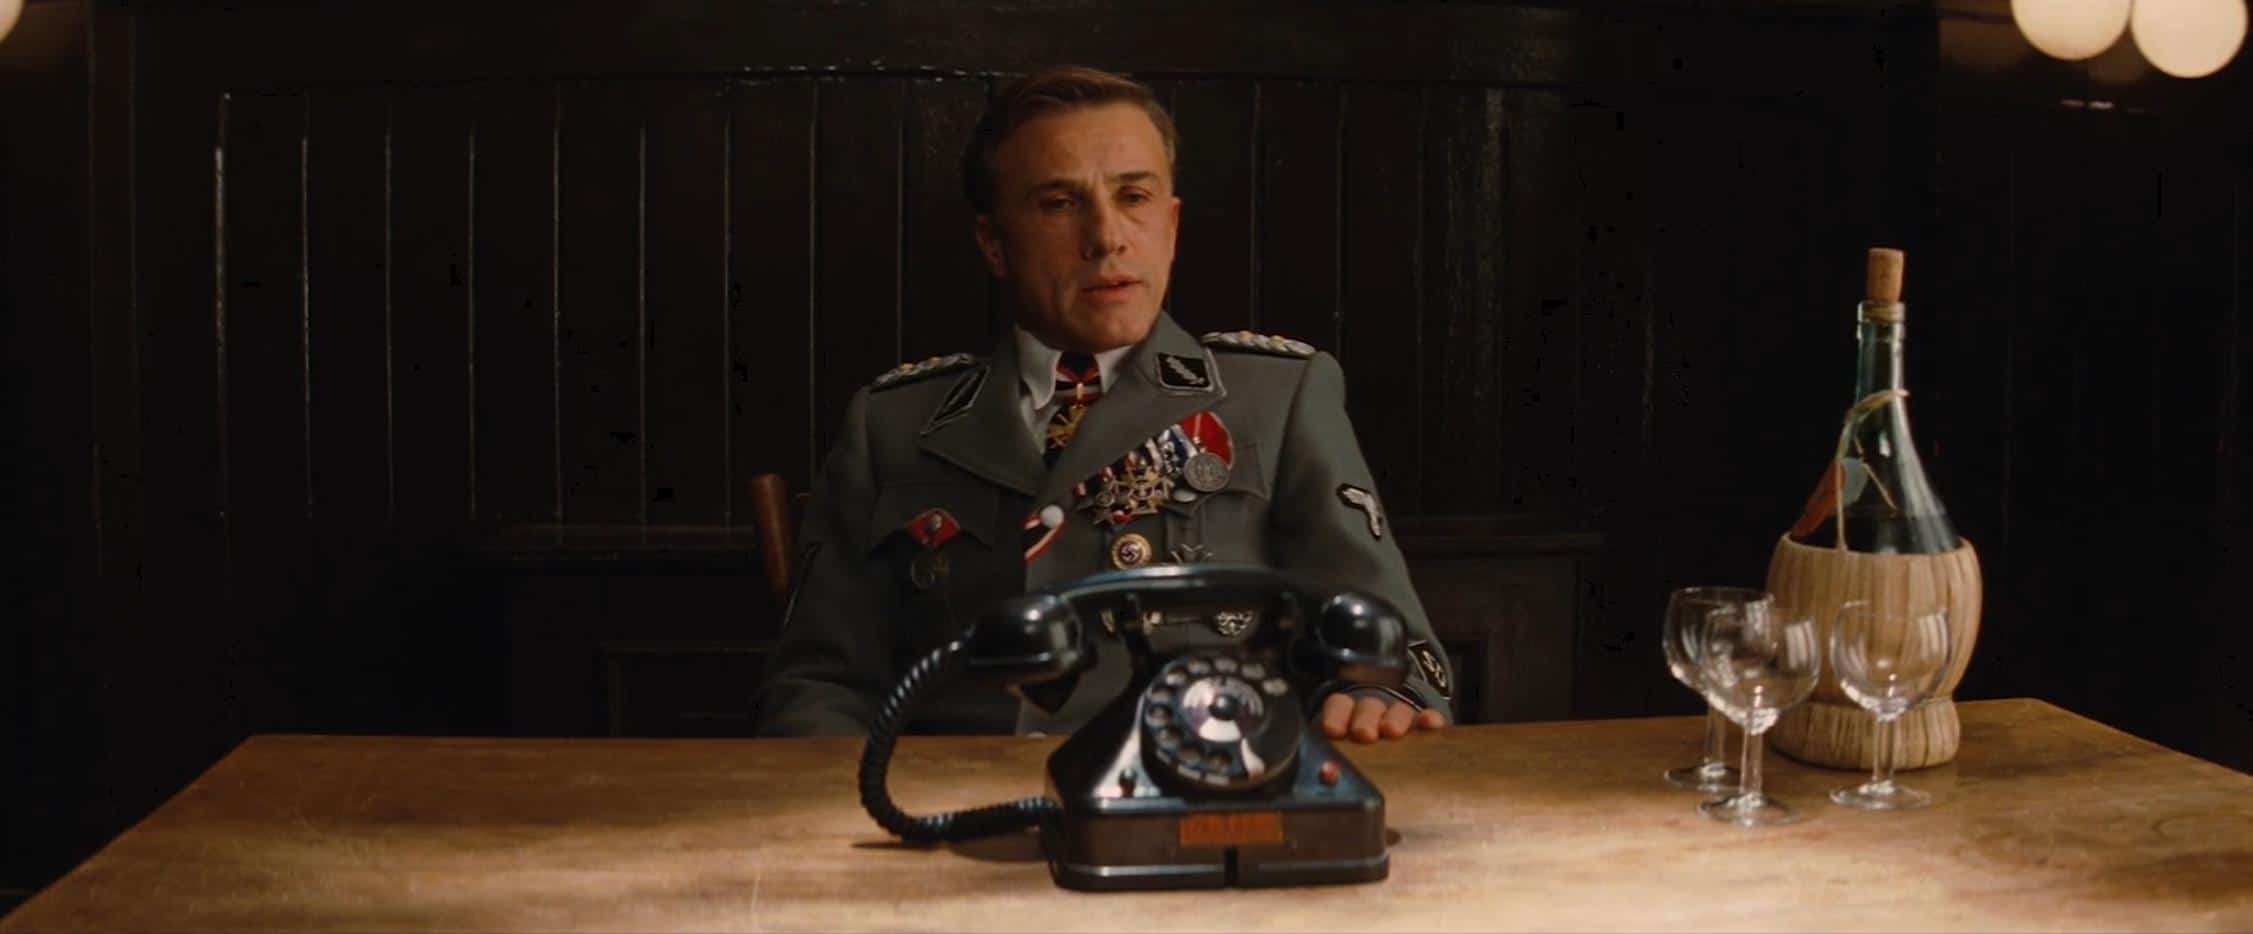
Bird’s Eye View. Usually done as some form of wide shot, this is where the camera is directly over the subject. The shot below from David Fincher’s “Zodiac” is one of Ryan’s favorites.

Bird's Eye View - Zodiac

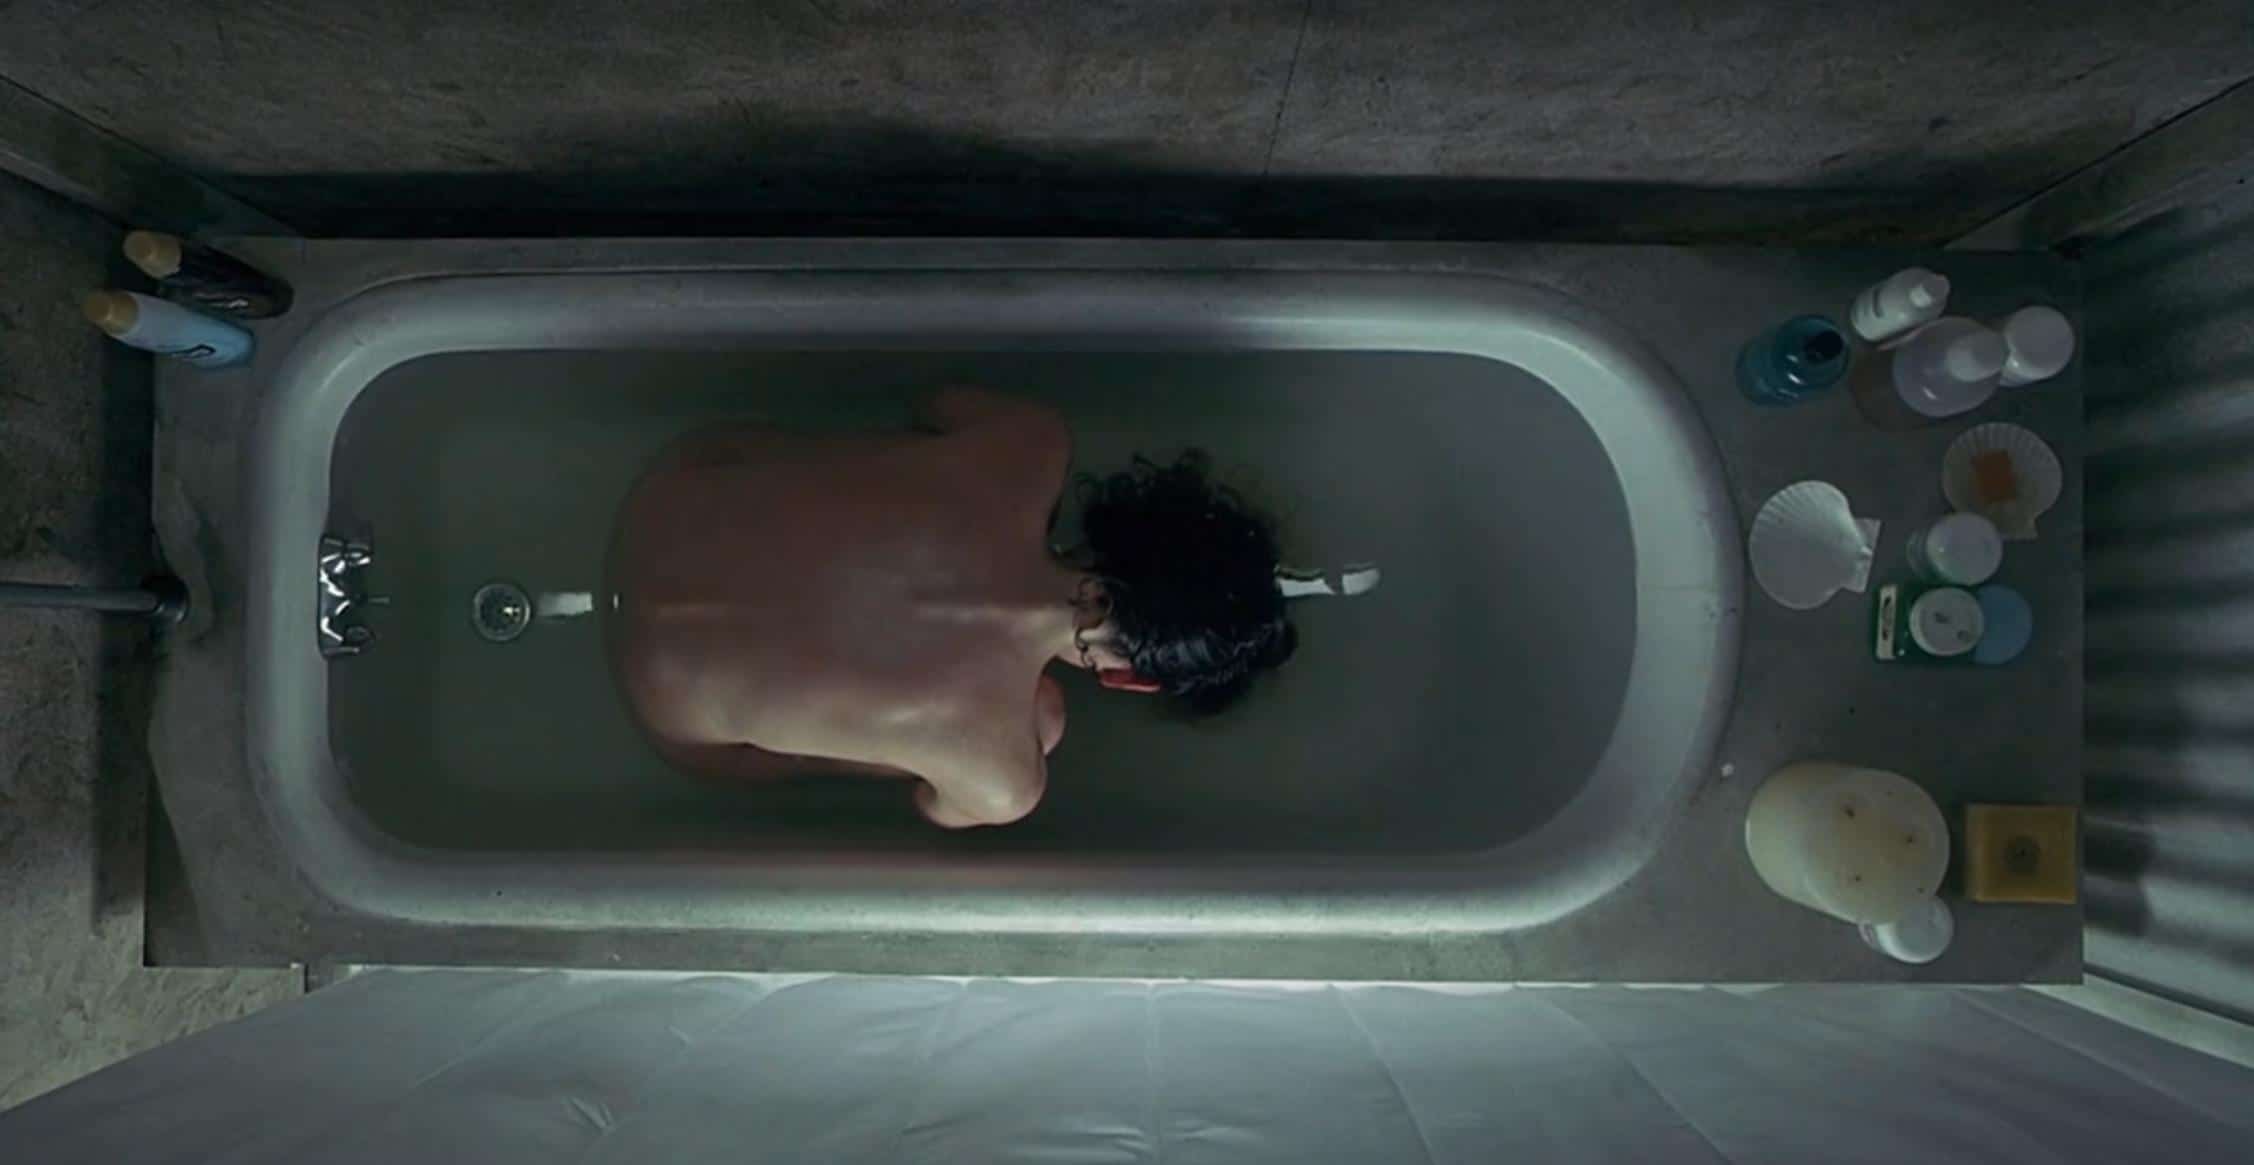
Overhead. The camera is directly above the subject (essentially a tighter version of the Bird’s Eye View).

Overhead Shot - Requiem for a Dream

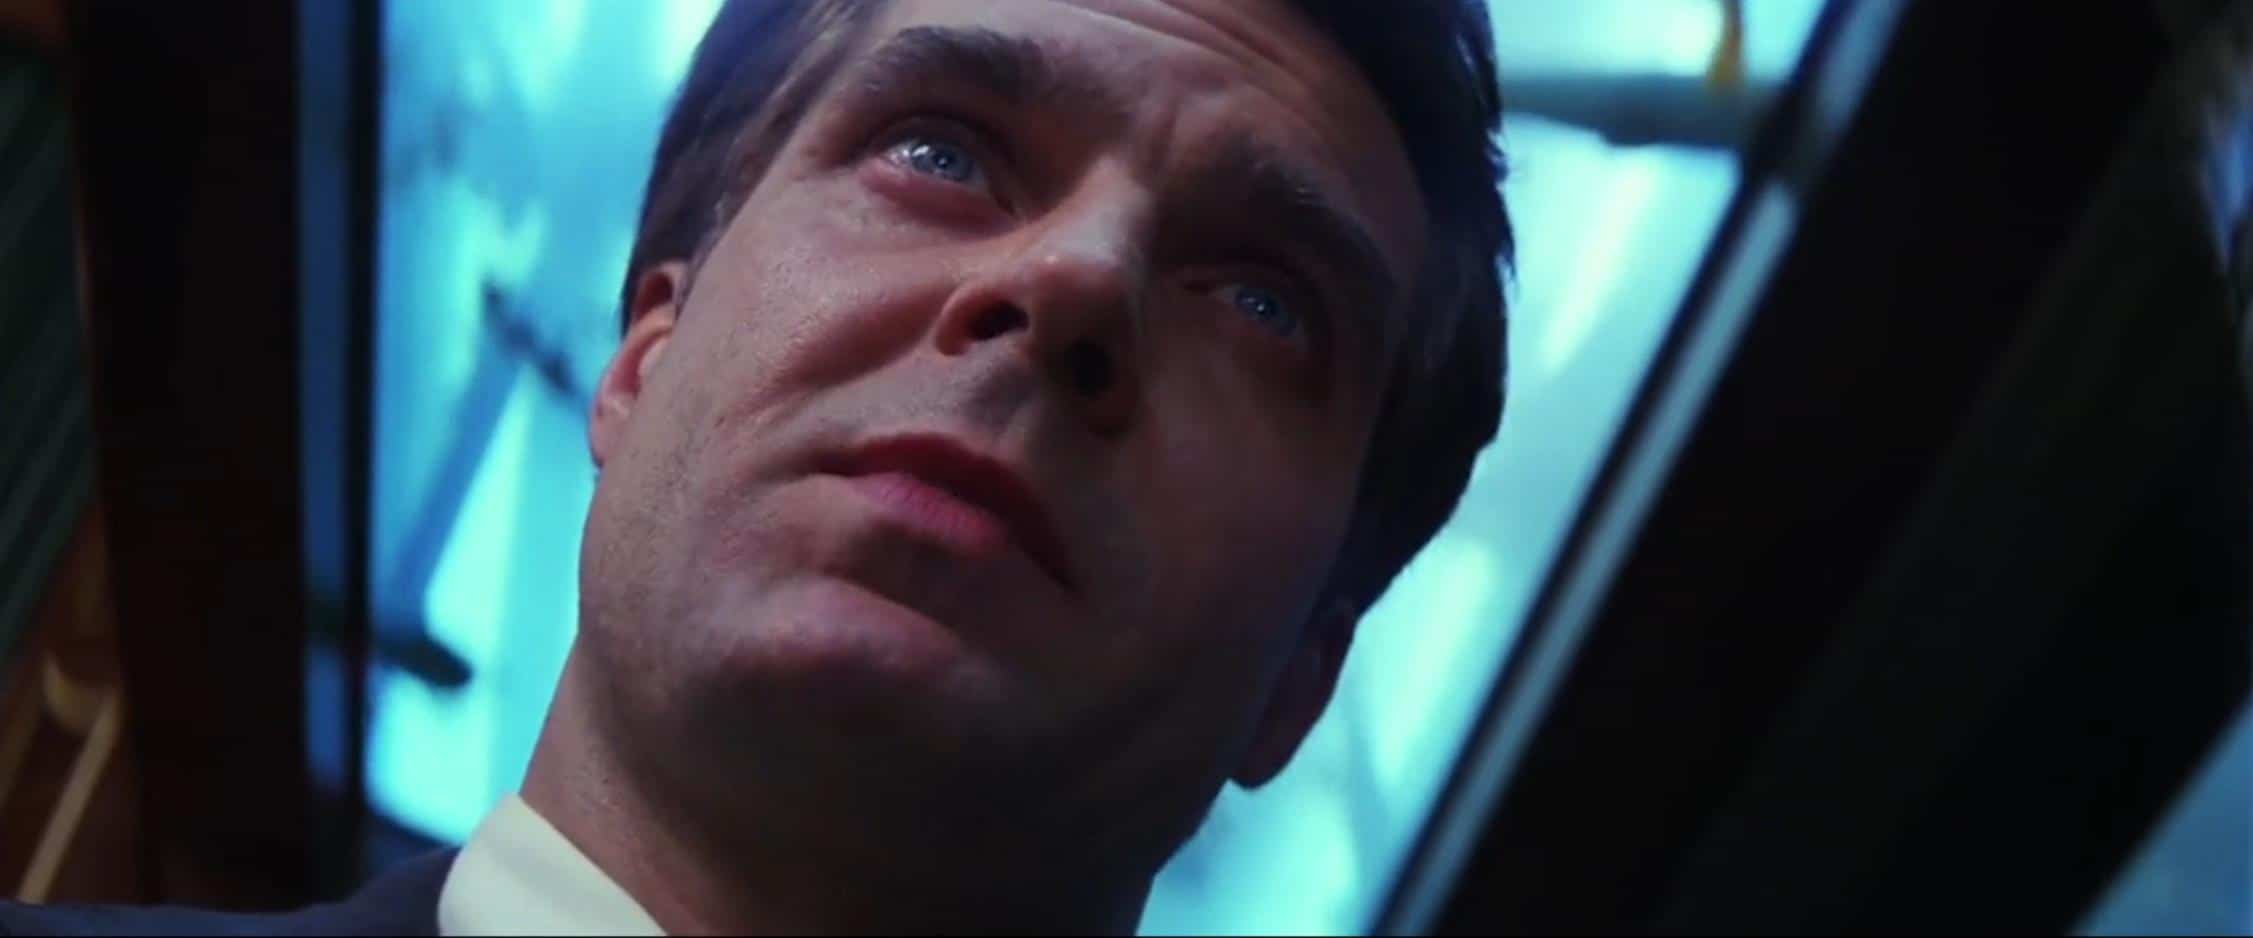
High angle. Just above eye level, but not directly above the subject. Usually used thematically to make the subject seem lesser or weaker.

High Angle - Inglorious Basterds

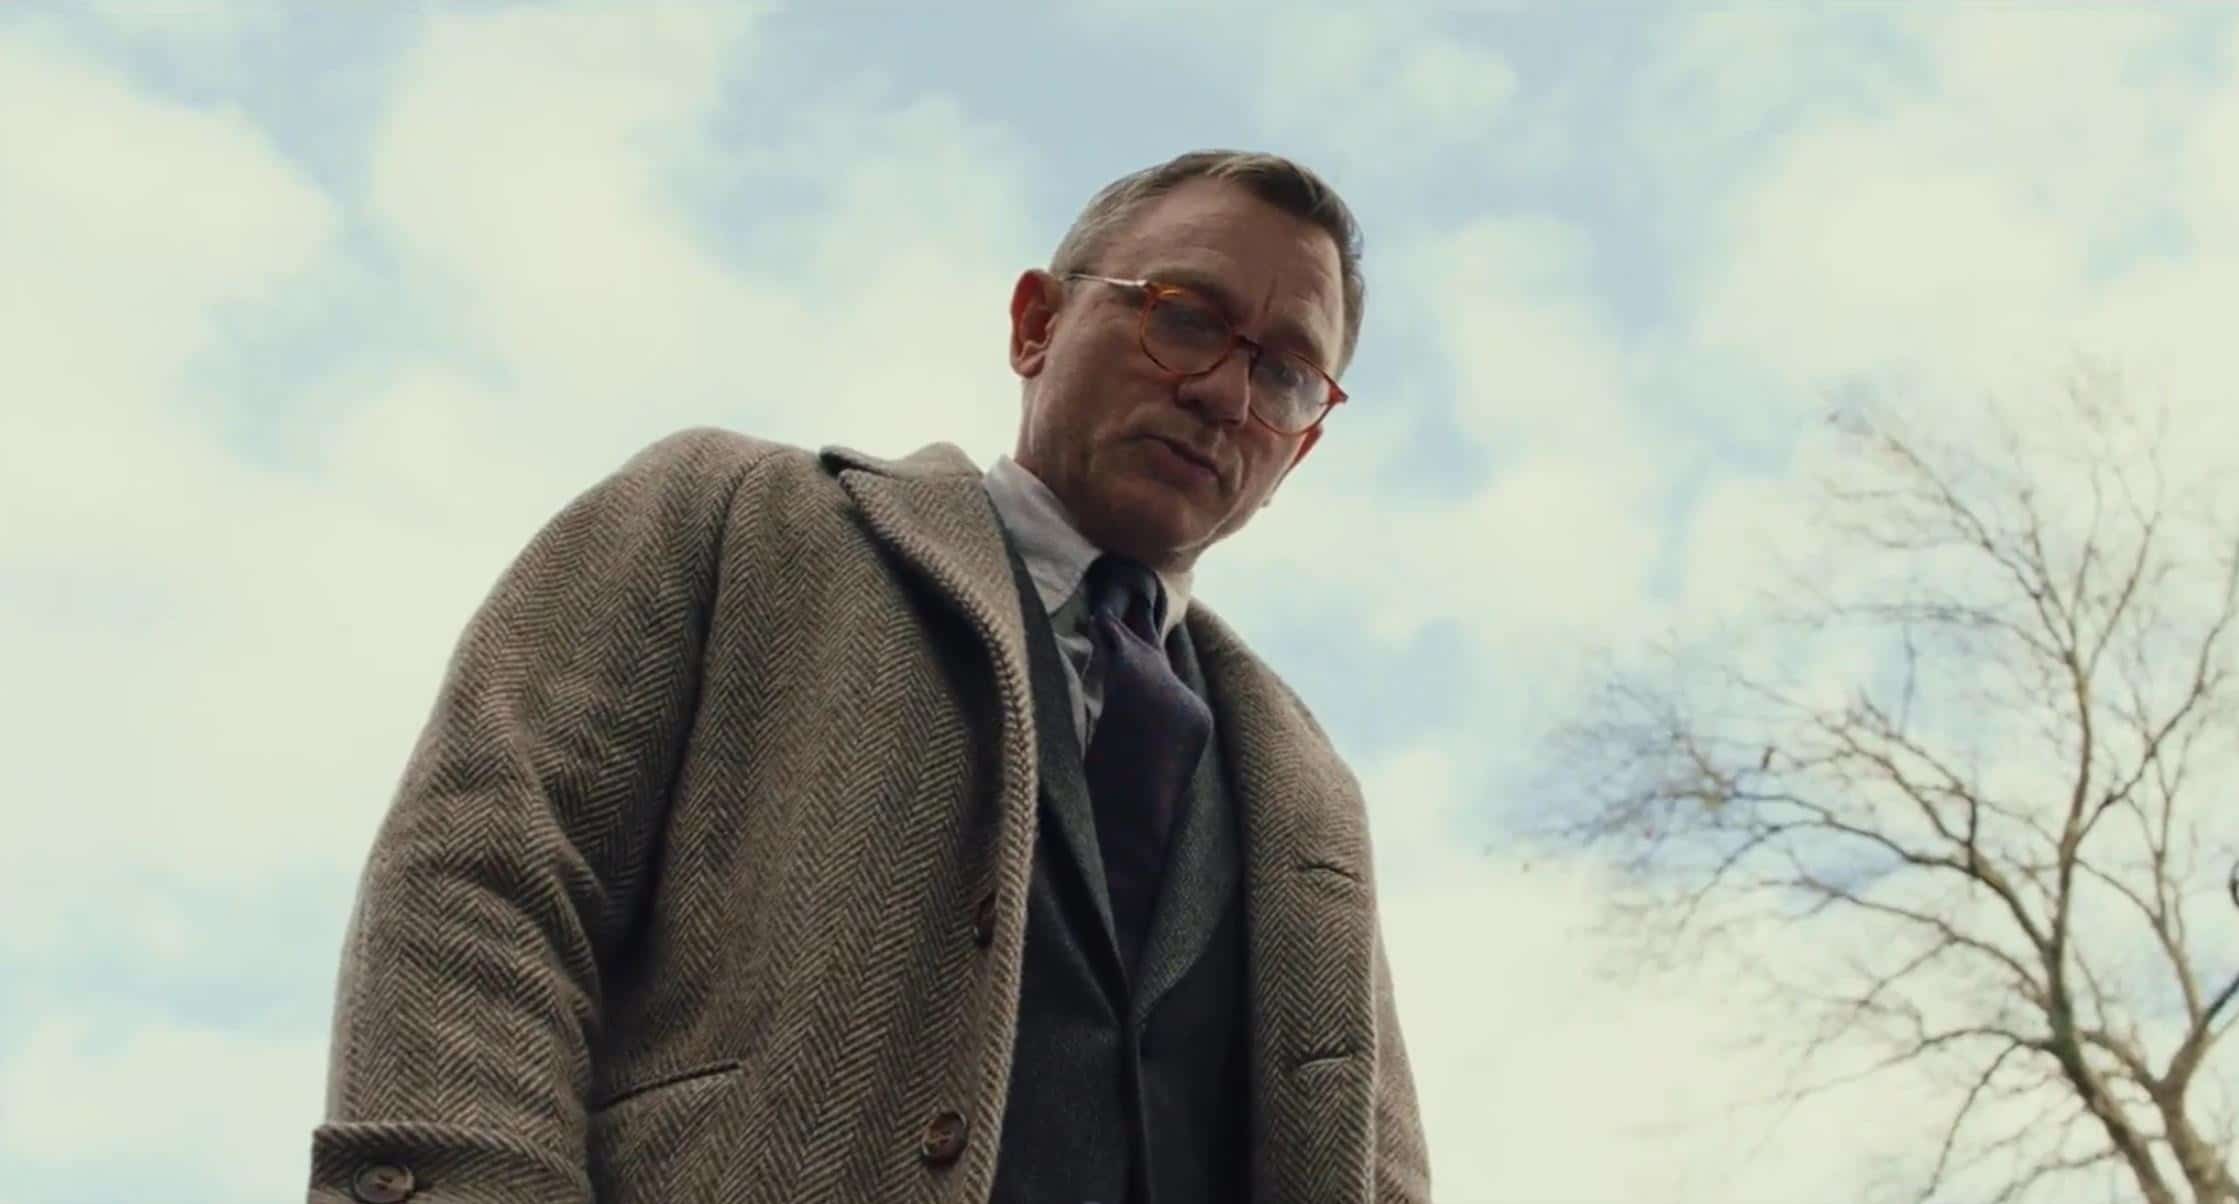
Low angle. Often used to make the subject seem dominant and powerful.

Low Angle - Knives Out

Dutch angle. Shots where the camera is off-center and titled. Ryan loves how the director Brian De Palma.

Dutch Angle - De Palma

Point of View (POV). There are two versions of this angle: the implied and the literal. The implied POV is when a character looks in a direction, then you show what they’re looking at.

Jurassic Park - POV Implied

Jurassic Park - POV Implied

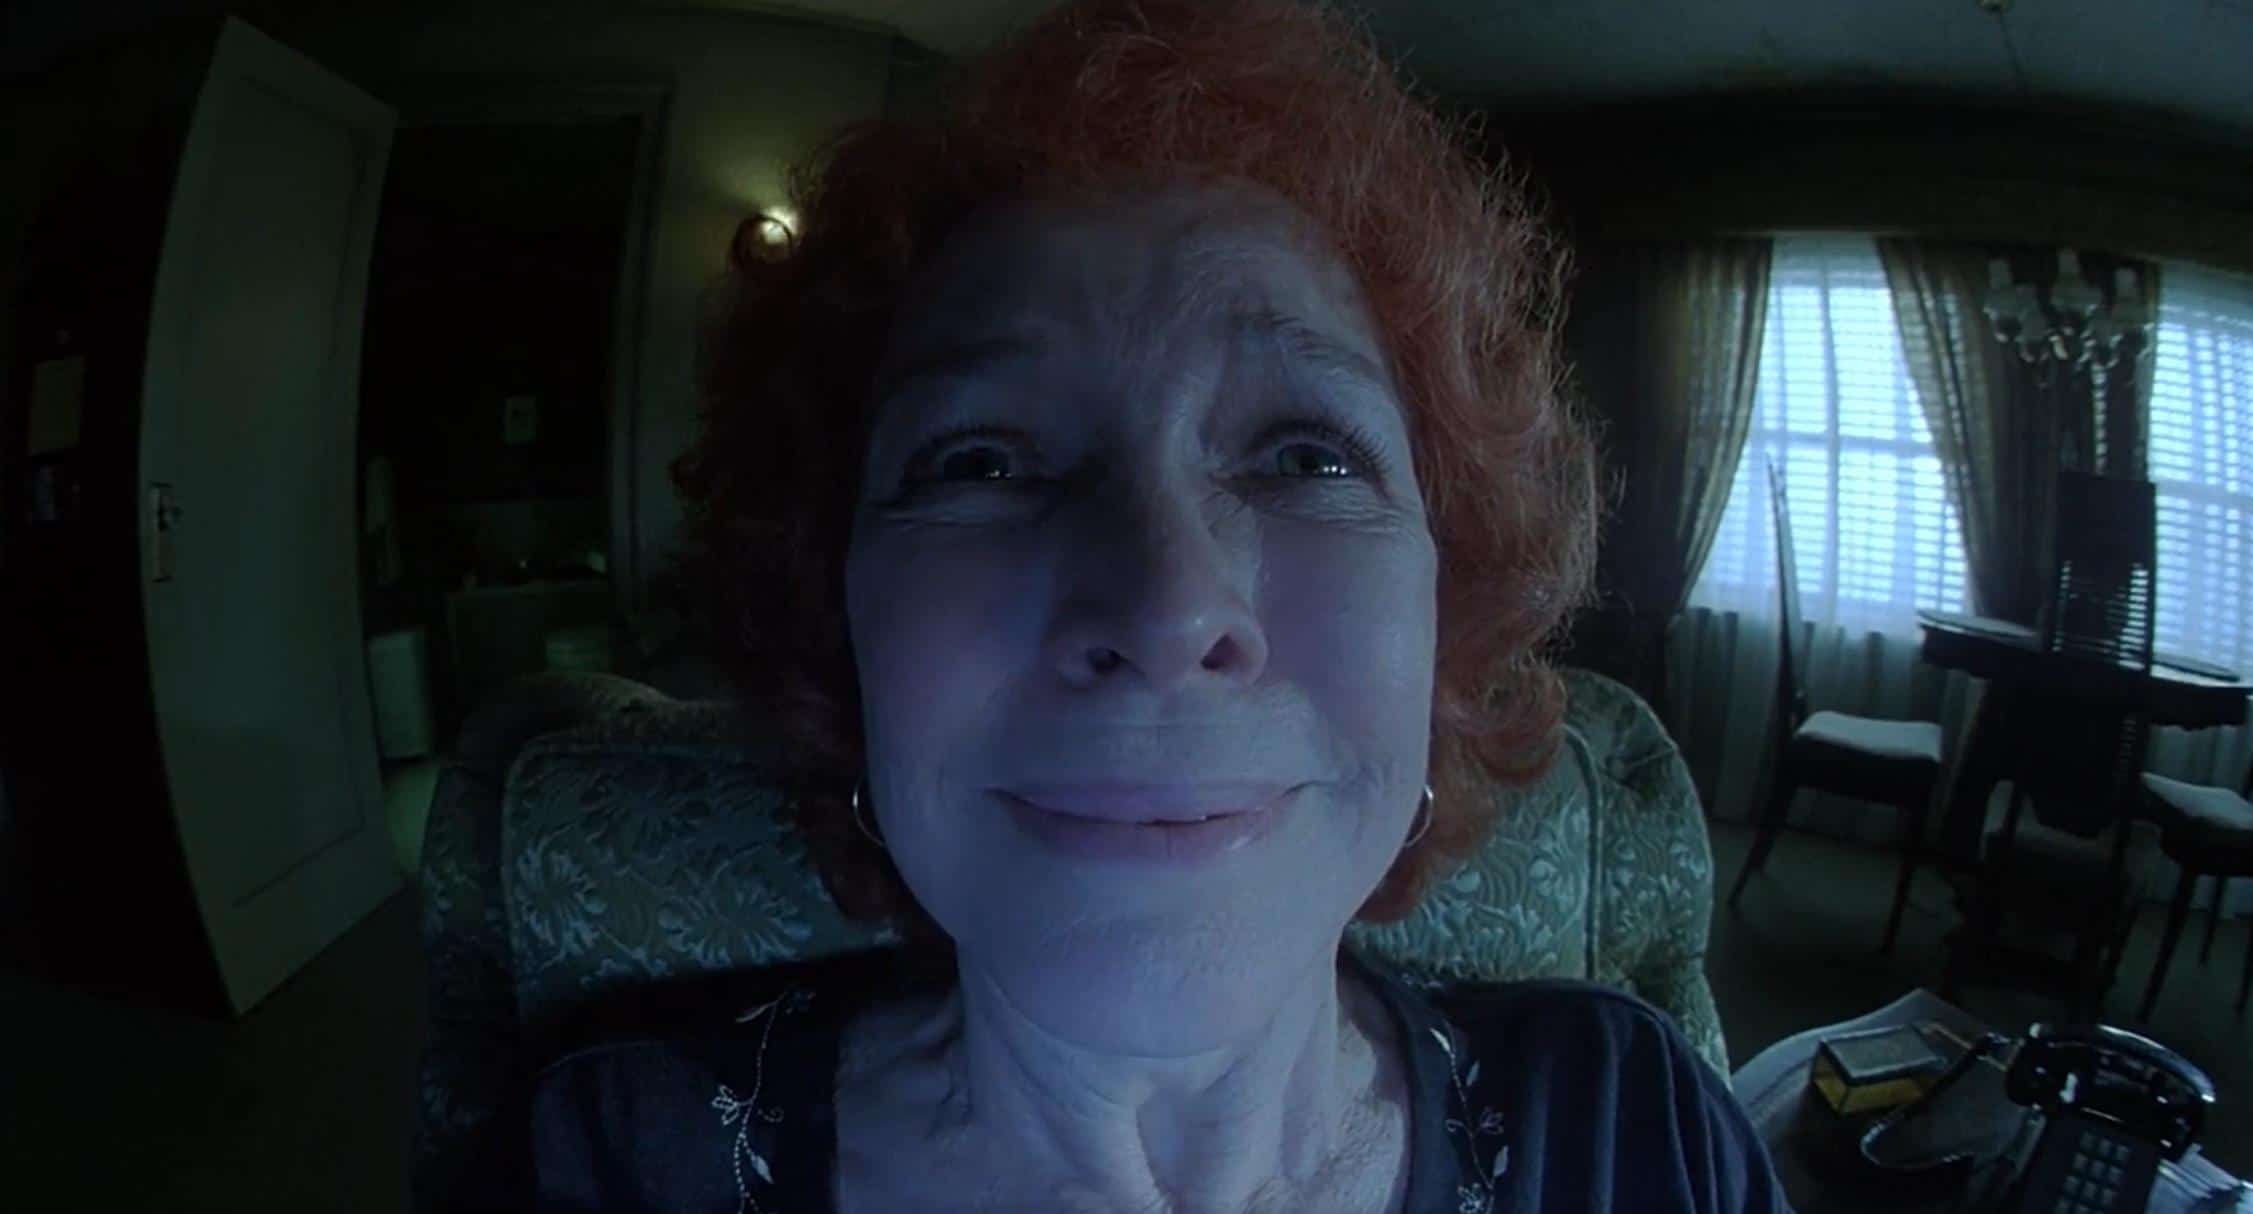
The literal POV is when the camera is in place of the subject and you are literally seeing what they’re seeing. It’s often used in horror films. Another good example is ET peering through his costume as he walks down the street with the kids.

POV Shot - ET

Framing

Everything that goes into how you compose a shot.

Clean or Dirty. Clean framing is when there’s nothing between the camera and the subject. Dirty is when there are people and/or objects between you and some key subject in the frame.

Dirty Framing - Godzilla

Over the Shoulder (OTS). Framing the camera so that you’re looking over the shoulder of one character to another.

OTS - Zodiac

Single and Two-shots. A “single” is when you just have one character in frame, and a two-shot is when you have (you guessed it) two characters in frame.

Single Shot - Inglorious Basterds

2 Shot - Inglorious Basterds

Movement

These are just the basic movement shots. Be sure to check out this episode if you want a full run-down.

  • The Pan. The camera angle is changing, but the camera itself is not moving laterally.
  • The Tilt. Moving the camera on a vertical access from up to down or vice versa.
  • The Dolly. When the camera is placed on a dolly and moves towards or away from the subject, or laterally.
  • Zoom. The subject becomes closer or farther away by changing the focal length. The background stays static.
  • Tracking. This is where the camera tracks along with the subject, used during “walk and talk” scenes. The movie “1917” is essentially one long “tracking” shot.
  • Crane or Boom shot. Movement of the camera when placed on a crane or boom arm.

Focal Length

Focal length refers to the lens. Lenses can have wide, medium, or long focal lengths. You can mix and match focal lengths with shot sizes to create different feels. This is more subjective and will change, depending on what you want your audience to feel.

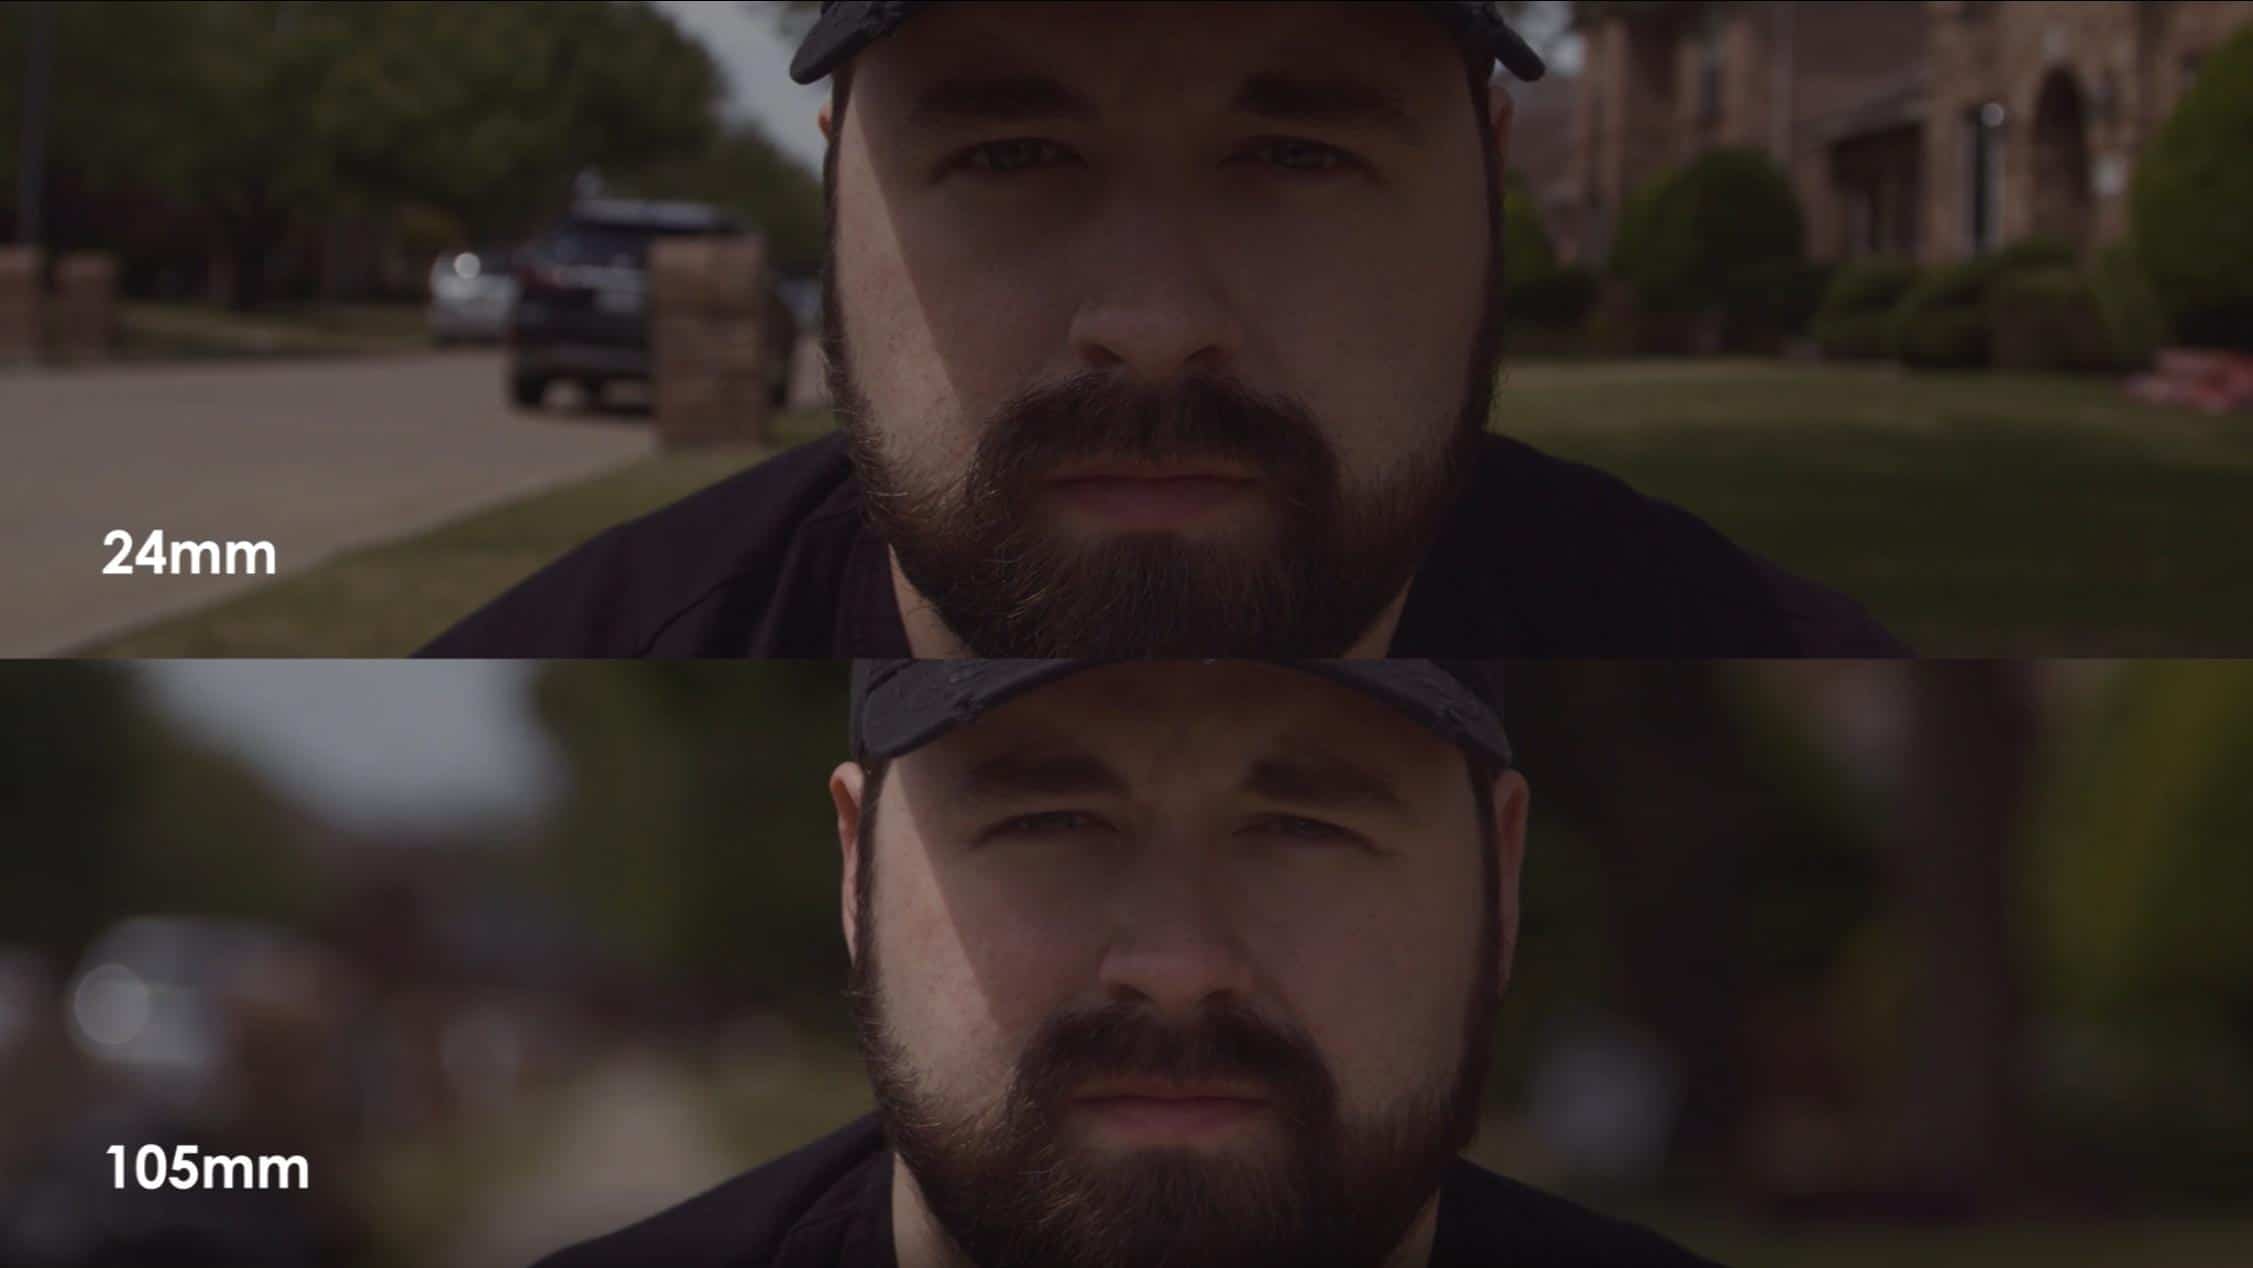
For instance, a close-up of a subject’s face on a long focal length (i.e. you’re zoomed in) will feel very different than a close-up using a wide-angle lens.

CU - Zoom
Close Up – long focal length (zoomed in)
CU - Wide angle
CU with a wide-angle lens.

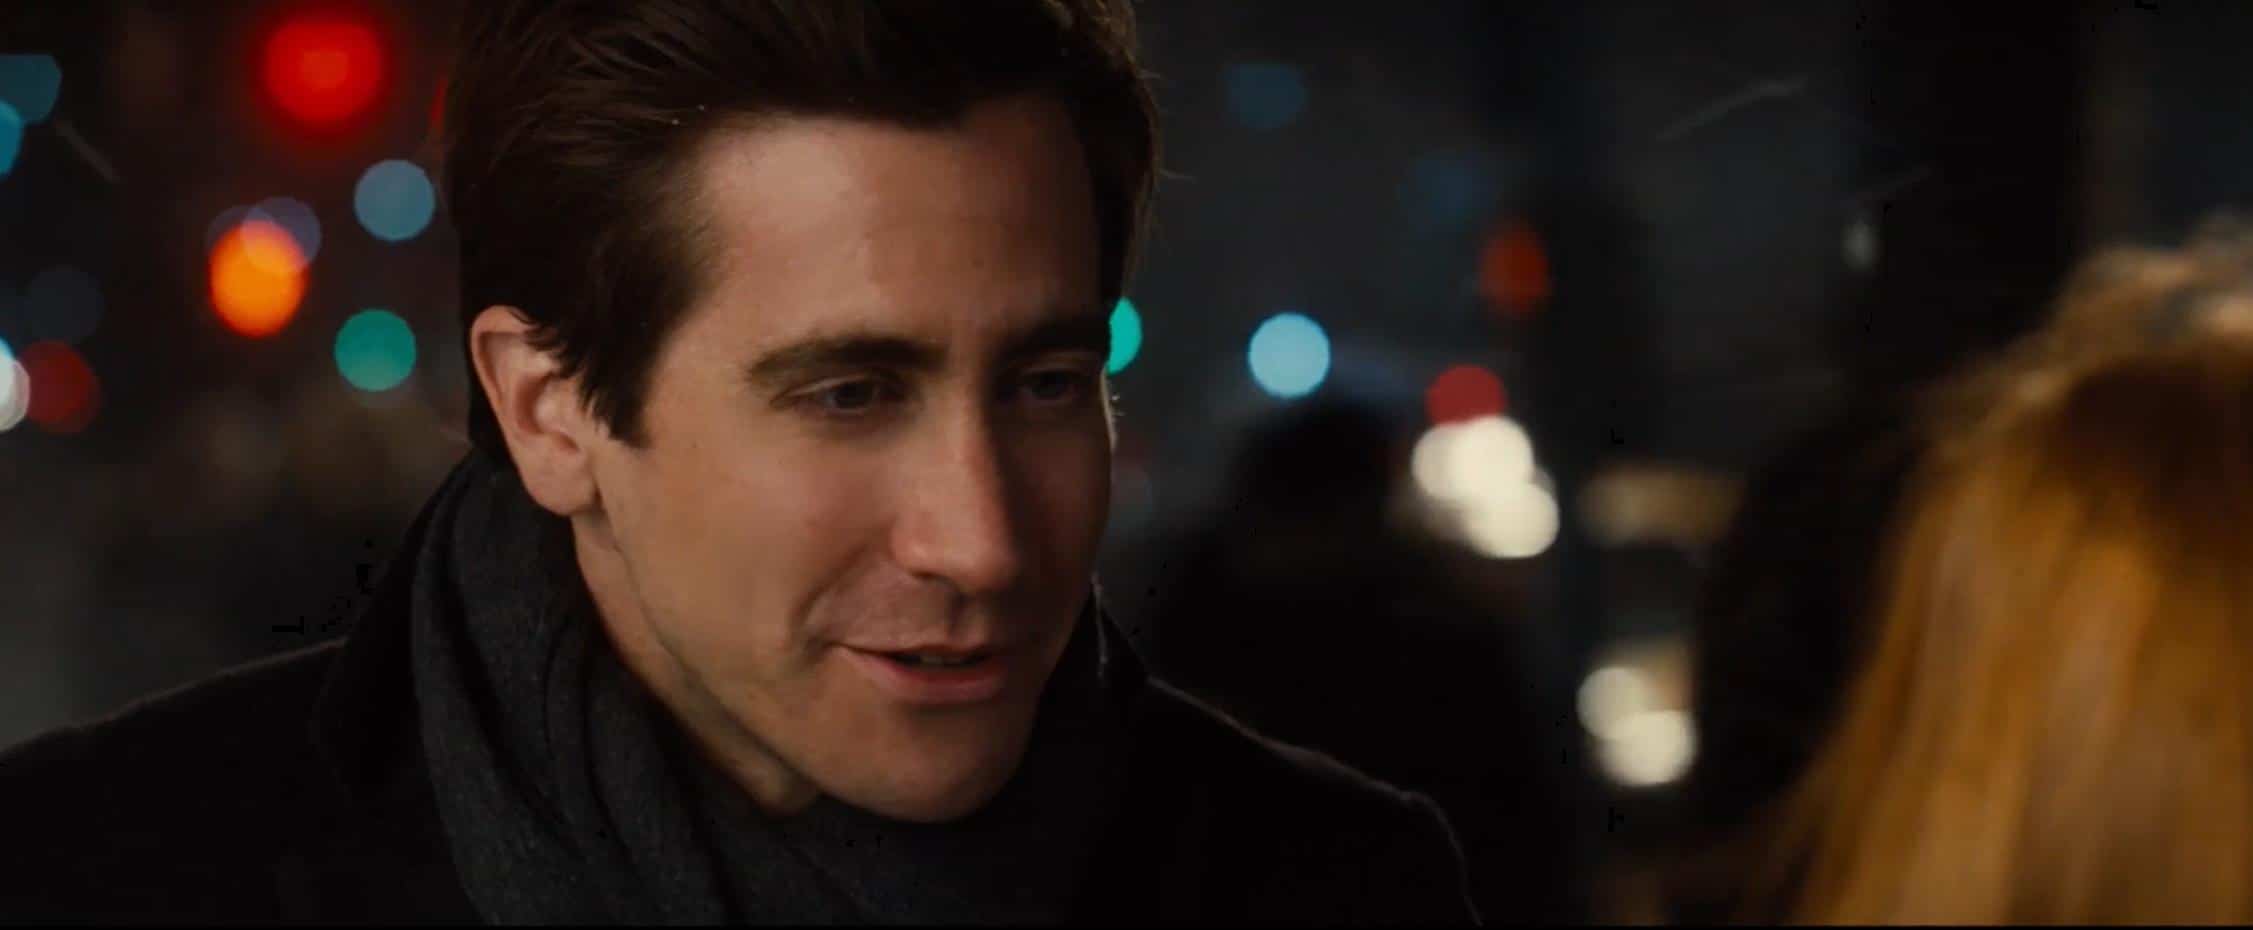
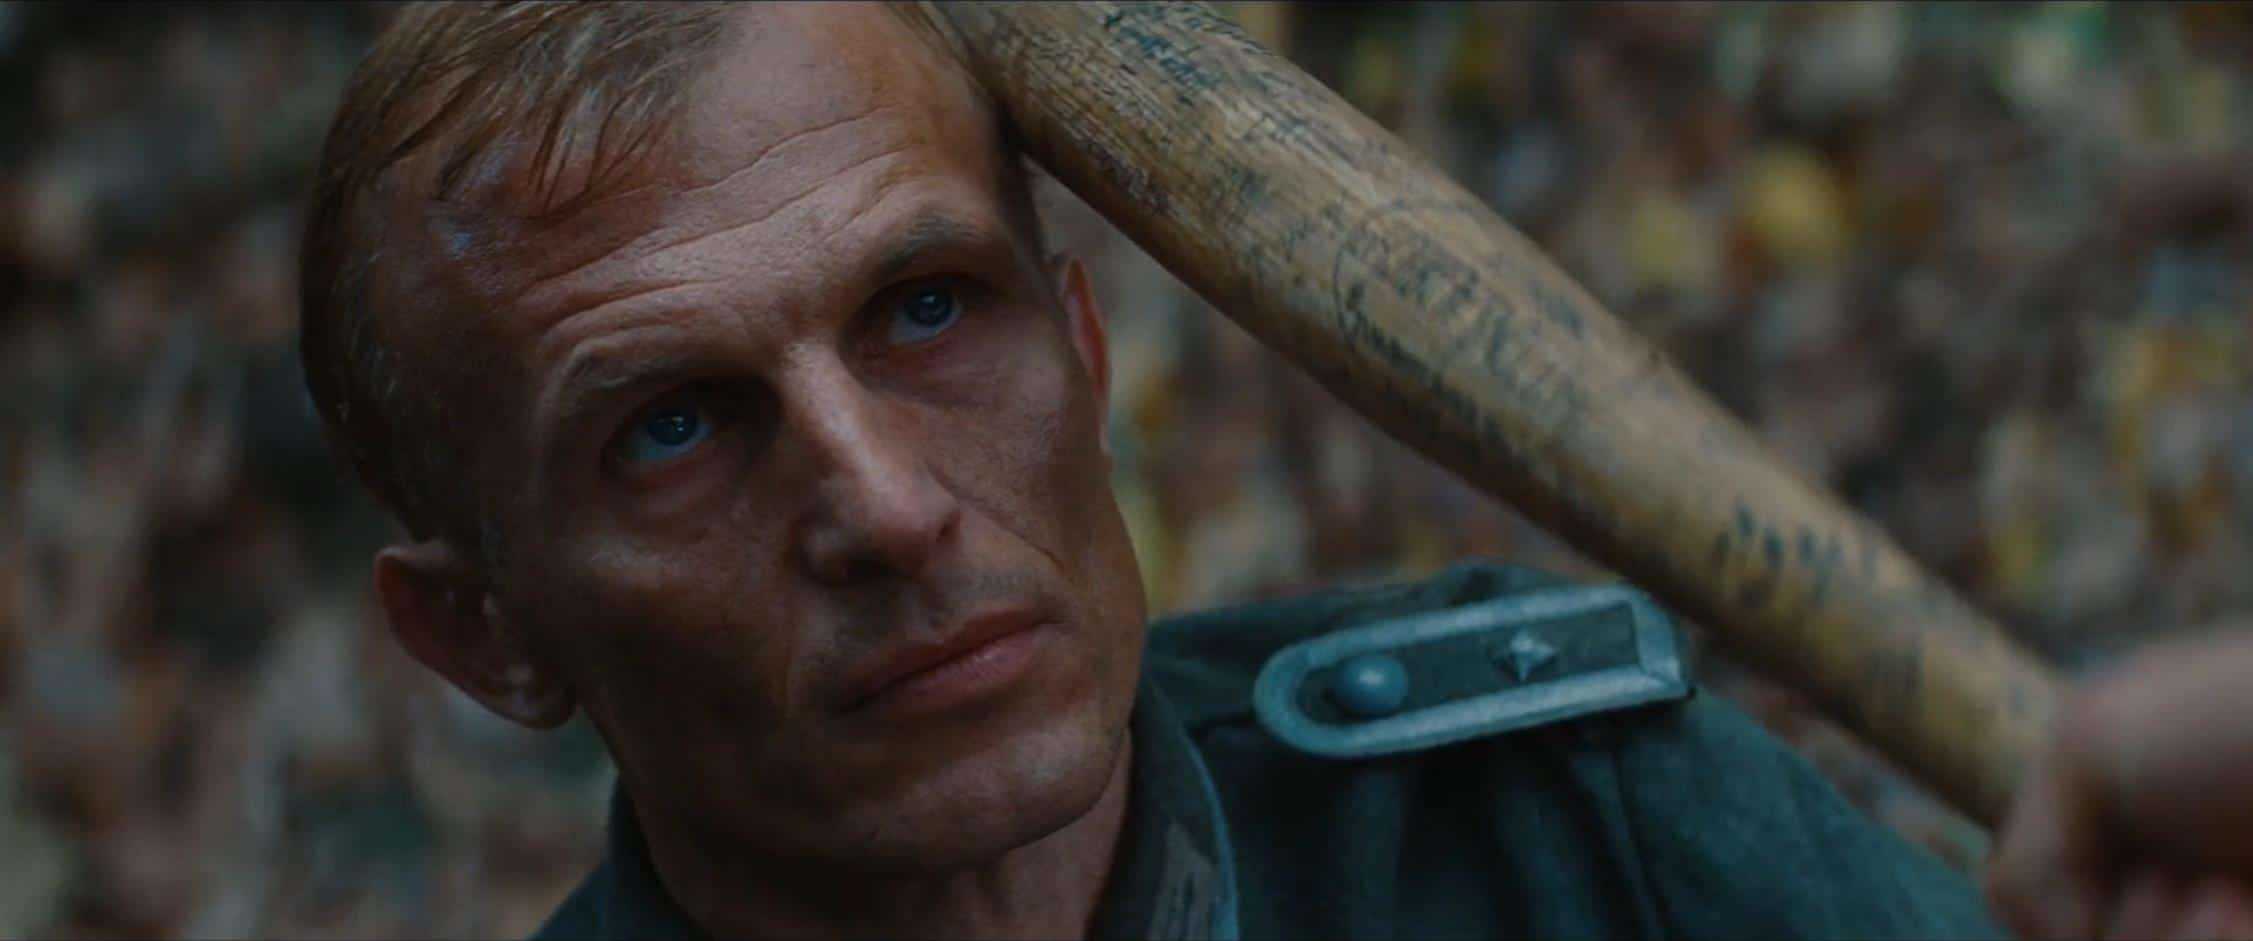
The background is also greatly affected when you have a close-up on a wide vs long. Like this shot of Josh below. The close-up on the long throws everything completely out of focus. Whereas the CU with the wide-angle lens keeps more of the background more from completely blurring out.
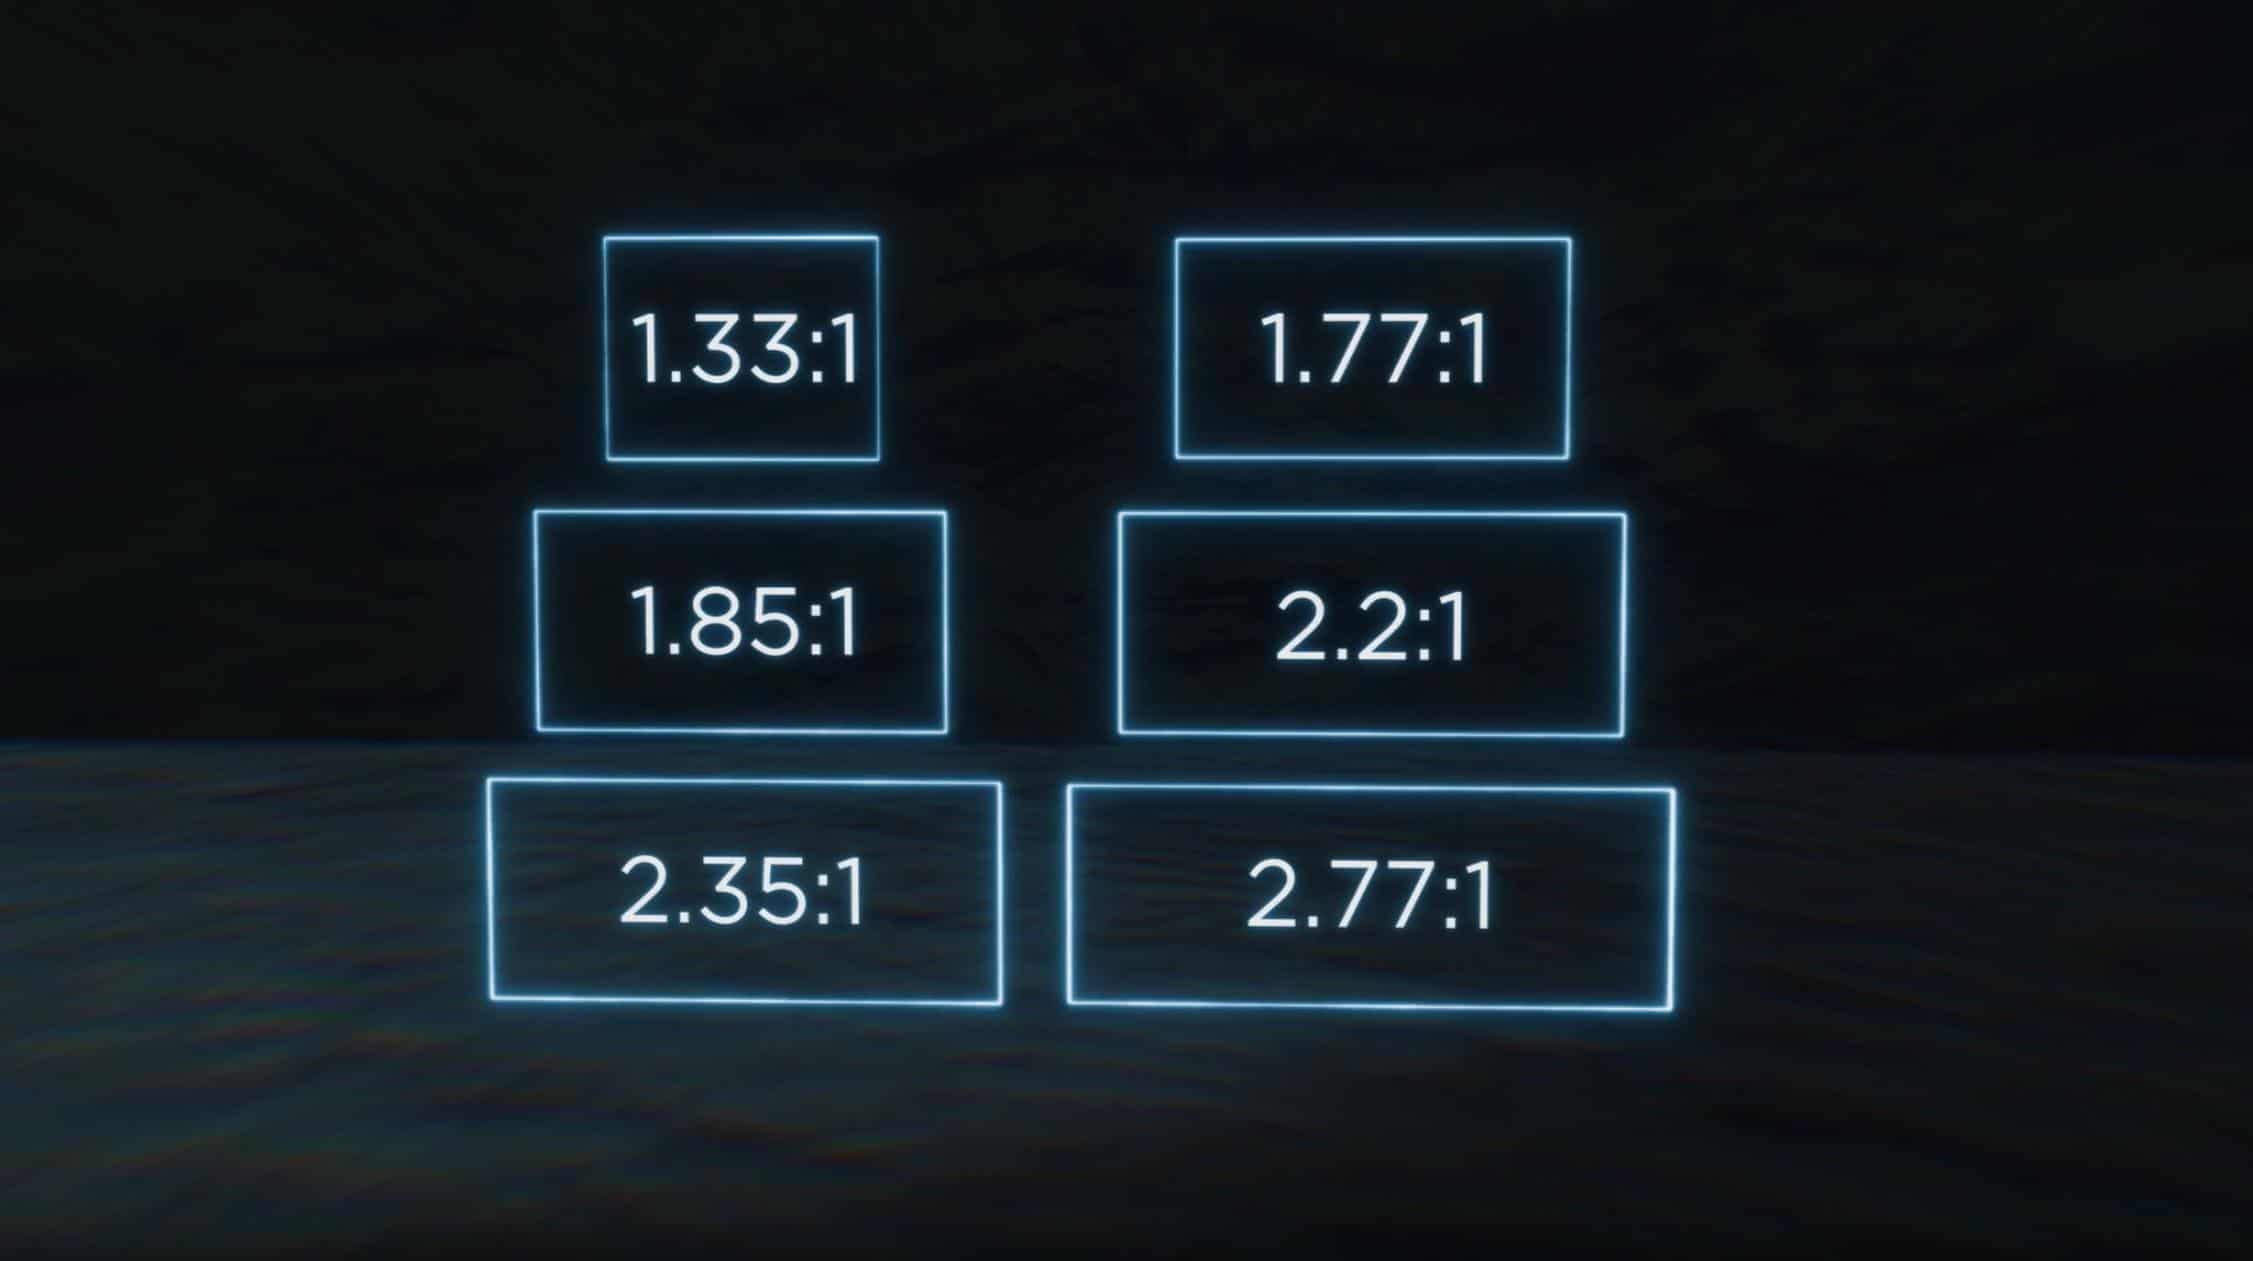
CU Wide vs. CU Zoomed

Aspect Ratio

It’s worth pointing out that the aspect ratio you choose for your film will affect which types of shots you use and how they are rendered on screen.

Aspect ratios

So there you have it. The basic “words” you need to construct your “sentence.” In case you missed it, here’s the episode that breaks down all of these shots.

How to be a Great 1st AC (Assistant Camera)

What is a 1st AC?

According to Wikipedia:

“A focus puller, or 1st assistant camera, is a member of a film crew’s camera department, whose primary responsibility is to maintain image sharpness on whatever subject or action is being filmed.”

When the camera is rolling, the job of the 1st AC is to pull focus. Granted, it’s a bizarre and magical skill to keep an entire movie in focus, but being a good 1st AC is about a lot more than just keeping sharp focus. There is a lot more time on set spent waiting to roll versus actually rolling. The time in between takes is where leadership, or the lack of, is on full display.

A turning point in my camera assistant learning curve was seeing the crucial way a 1st AC would lead the camera department, for better or for worse. I’ve worked with a handful of focus pullers that can in fact, pull focus, but are total nightmares to work with, which in my experience, isn’t always the best trade-off.

What separates the average camera assistant from next-level, is whether or not they have the DP and the entire department’s needs in mind, or just their own needs. A camera department is only great when they’re a great team.

I find that sharing knowledge is vital in preparing aspiring filmmakers. Therefore, I asked a few professional camera assistants to dig deeper into a few skills and qualities that a solid 1st AC should have. Here’s what they had to say.

Diego Montiel

Diego Montiel is known for his work on Unhinged, Into the ashes, and I Can Only Imagine. You can follow him on IG here.

1st AC Diego Montiel
Photo by Justin Robinson

Take Care of Your People

Know how to deliver the bad news just like the good news. Know when to take one for your team and know when to let your team take it. Balance is key. “Complaints go up, not down.”

Don’t Treat Your Crew Like Kids

You’re not sh*t because you have people “under” you, technically speaking. Talk to them straightforwardly and sincerely, never judging, and always listening. Integrity will make people respect themselves and make them honor themselves more. And that creates encouragement to do better. If you joke on set, prepare to get joked on. If you don’t like jokes on you, then don’t joke with people.

Be Physically and Mentally Capable

If you party hard, work harder. Don’t wait for the next project to get healthy or in shape. In THE LAST SAMURAI, Tom Cruise’s character got hit many times with a wooden sword before the Samurai accepted him; but it was his mental and physical abilities that made the change. I’m so demanding and so are other 1st ACs, so once I see you’re capable, that’s when I’ll teach you my ways.

Your Marks and Your Monitor

Know when to look at your monitor and when to stay away. Look at it a lot if you only mimicked rehearsals. Everybody f*cks up, but let it be known if you need marks or if you need to see the ending frame. Don’t have the DP babysit you. Sometimes, you have to live by your marks (e.g. if the action is too fast and too important to double-check yourself on the monitor). Sometimes, you die by your marks (e.g. if the dolly isn’t marked or the camera operator moves spots right before rolling, or the actor doesn’t hit their marks or just plays it differently all of the sudden.)

Have Fun

It’s not all about being on the biggest show, it’s all about being with a damn good crew. See it like a fantasy sport, where you’re picking your team and creating an amazing group that just clicks. Think about the “Dream Team” in basketball when Michael Jordan, Magic Johnson, and Larry Bird all played on the same [Olympic] team. That way, every camera order or movement is like a formula one pit stop — precise, fast, clean, aware, focused, and consistent. The rest will fall in line. Winning and gelling together always feels good.

Andrew Bradford

Andrew Bradford is a 1st AC and cinematographer known for his work on There Comes a Knocking, Mountain Rest, and Pizza Time. You can follow him on IG here.

1st AC Andrew Bradford
Photo by Josh Stringer

Pulling focus is only 10% of the job

I pride myself in my focus pulling, but that’s not what makes a great 1st, in my opinion. I’ve come to realize that even though that 10% is dang important, it’s so much more about leading your team and how you handle adversity. Setting up your team for success is key. Film is just a giant problem-solving game. If Tetris stresses you out, don’t work in film.

Anticipate

We all know when the 1st AD calls, “Quiet on the set!” that we’re about to roll the camera. But being aware to anticipate more subtle things is where I continue to force myself to grow. Like when the DP is talking to the director about a shot, I try to keep my ears open and anticipate if they’re talking about a lens change, taking the camera from sticks to dolly, or if something might be dangerous in frame if we’re looking a certain way.

My brain never stops thinking about how we can be ready for whatever comes and so I can be two steps ahead of it. Maybe that’s something as simple as knowing when to anticipate getting the camera cart ready to move to a new spot or setting up the video village in a better location.

Keeping a clean environment

Cleanliness is one of the greatest things you can do and it’s something that should never be done half-heartedly. The cleanliness of the camera tells me everything I need to know about an AC. A neat or unorganized camera department can ultimately set the tone for the set. If the video village is full of cables that act more like tripping hazards, I guarantee that you’ll start to see how much more messy things can get with other departments.

Always keep the camera cart clean. Make sure the cables on the camera are always neat and not hanging off begging to catch something. And per your 2nd AC, keep the slate clean and very legible. A sloppy slate shows how little you value post-production and helping others do what they need to do.

Know and love the technical side

At the end of the day, I love telling a story and that’s why I work in this industry. But I’ve learned to love the technical side of the camera so if the DP has a question, I can give them options so they don’t have to work so hard finding a solution. I love the ability to free the DP’s mind of the technical so they can think solely about the creative.

Go the extra mile

This is not as obvious on set as you might think. Pay attention to your DP and team and what they like from craft services. For example, one DP I work with has grown fond of drinking Emergen-C with his water. I started keeping a few packs of it in my AC bag in case craft services didn’t have it. Going the extra mile is not ever going to bring you glory or recognition; but what it does is make you a better AC because you can empower your team behind the scenes. Don’t ever settle doing less than everything you can give.

Nicholas Rey

Nicholas is a 1st AC best known for his work on War Room, I Still Believe, New Life, and Run the Race. You can follow him on IG here.

Nicholas Rey
Photo by Drew Garraway

Be Nice

It sounds basic, but there’s so much to it. It’s a skill that, unfortunately, we’re not all equipped with naturally. It’s the act of genuinely being nice that allows us to excel in this industry. If others not only can see you’re good at your job, but they also happen to enjoy being in your presence, you’ll go a long way. You also never know which person on set may one day be your boss on another job. That’s why it’s imperative to be nice to EVERYONE.

Be Aware

Being aware of what’s going on around you–knowing who does what, knowing when to give input, and knowing when to shut up–all of these fall under having a general awareness on set. Normally, there’s a flow of how things operate, depending on what you’re working on. Knowing this flow is very important to an AC and any position on set.

Never Stop Learning

We can always get better and be better. It’s important to keep an open mind to learning from someone that you may not expect. Social skills allow us to meet more people on each job we work. That can then in turn lead to more work and more learning.

There are so many cameras and even more accessories that are all constantly evolving. Technology is constantly changing and moving forward, so it’s important to stay up to date on what’s out there. It’s important to read online articles, threads, discussions, etc., about the latest tech or any changes happening in the camera world.

Stay calm

The 1st AC that gave me my first job on set taught me a lot, but there are many things he didn’t teach directly. I had to learn them indirectly from watching him work. One of the most important habits I learned was remaining even-keeled on set no matter what is going on around you.

I learned to stay in my lane, control what I can control, and no matter how high or low things got, to keep my cool. Learning to slow down, think, and not get rattled, allowed me to work confidently and avoid mistakes as well. As a leader in the camera department, it’s important to stay calm and collected because others will follow.


MORE ON THE ROLE OF A 1st AC

Rediscovering the Art of Under-cranking

These days, camera manufacturers are obsessed with adding “k’s” to their resolutions and offering progressively higher frame rates for better slow-mo capabilities. And sure, this has revealed a new world of possibilities for post-production effects; but it’s also had unintentional consequences.

Phantom camara - opposite of under-cranking with high speed frame rates
The Phantom T1340 has a maximum FPS of 113,510!

Our fascination with the latest and greatest technology has consigned other techniques to the background of our minds, where they lay forgotten and gather dust. One of my favorite long-lost techniques is under-cranking.

In the right hands, under-cranking can add a natural motion blur to your hyper lapse or give product videos a snappier, more engaging style. Because it’s not used that often, under-cranking almost always stands out when compared to more modern filmmaking trends.

Let’s explore how under-cranking works and a few examples of how you can use it in your projects.

What is under-cranking, exactly?

Back in the day, camera operators had to crank a handle to roll film through the camera. It seems like a tiring, thankless process.

If the camera was cranked quickly, more footage was exposed, which meant more frames and a more detailed look with slower movements. Welcome to over-cranking. If our camera guy cranked his camera slowly, fewer frames would be captured and movements would look jerky and sporadic. This technique was dubbed under-cranking.

Everyone knows the story of over-cranking, because it went on to become what we think of as slow motion, (i.e.. the obsession of every camera company).

But under-cranking stayed around too, and it found a steady job in action films. After all, fewer frames produces faster looking movement.

This is particularly relevant when you’re shooting a fight scene. You’re not going to want actors (or their stunt doubles) going full speed during the take — unless you’re alright with someone taking a full-force roundhouse kick to the face.

Instead, you under-crank the camera, capture fewer frames, and film the shot in a way that accelerates movement. You get the same intense effect without the risk of bodily injury.

To be clear, we’re talking about in-camera under-cranking. You’re slowing the frames per second (FPS) down to between 22 or 20.

Now that you’ve got a better grasp of under-cranking, let’s look at a few different applications of these techniques.

Making Action Even More Intense

Action sequences are the most obvious use of under-cranking. As the last section mentioned,  shooting at a slower FPS when recording fight sequences is a longstanding use case.

Rather than retread old ground, let’s look at something more innovative: co-writer/director George Miller’s Mad Max: Fury Road.

From the fleet of custom made vehicles to the 120-minute adrenaline rush of plot, there’s a lot to love about this film. One of the ways Miller made the action scenes so intense was by manipulating the frame rate. In certain key sequences, the camera is clearly under-cranked.

“Something like fifty or sixty percent of the film is not running at 24 frames a second,” said Jason Seale, the DP for the film. “It’ll be running below 24 frames because George Miller, if he couldn’t understand the shot, slowed it down until you could.”

Watch as the under-cranking really kicks in at 1:30:

You wouldn’t think the action in this sequence could get any more intense. After all, we’re in the middle of a post-apocalyptic car chase.

But under-cranking certain shots — and not hiding the effect, but instead emphasizing it — injects an otherworldly intensity. The jerking motion gives the action a lurid aspect, making the viewer feel as if you’re being pulled headlong into the action.

Shooting a dynamic hyperlapse

These days, everyone is all about hyper lapses, and you can create one by using the under-cranking method. Think of a hyperlapse as a moving timelapse, or more specifically, a timelapse in which the camera moves a significant distance.

To get that trademark movement in hyperlapses, most people are manually taking photos, stabilizing them in an editing software, and stringing them together. If you like to suffer for your work, this is always an option—but it’s worth considering this type of project from a different angle.

If you significantly under-crank the camera’s FPS, you’ll capture so few frames that any moving objects will inherently have that hyper-realistic motion blur. Of course, we’re talking much lower than 23 or 21 FPS — something more like 10 FPS.

And instead of hours of post-production work, you’ll only have a little touching up to do when it’s time to edit.

However, make sure you shoot with some sort of camera stabilizer to avoid that jerky handheld look. Undercranking makes the subjects’ movements in front of the camera more intense, but it also makes any movement by the camera more exaggerated.

For that reason, I recommend steering clear of shooting with a handheld and instead using a stabilizer (like a Ronin or Zhiyun) or a tripod.

Here’s a video with a few hyper lapses I did for Soundstripe at NAB in 2019:

Since under-cranking isn’t widely utilized for hyperlapses, lots of filmmakers opt for photo-based technique. Essentially, you capture a series of individual images and edit them together to create the hyperlapse effect. On the positive side, since you’re taking megapixel photographs instead of 1080p or 4k video, the image resolution of a photo-based hyperlapse will be superb. All those images give you a lot of options for post manipulation. However, it’s a lot more work on the front-end and back-end. Under-cranking only takes a short time to set up, and it looks great right out of the can.

Adding dynamism to product videos

If you’ve ever filmed a product video, you know they can be challenging — particularly if you don’t have any actors in the shoot.

Sure, working with inanimate objects is less complicated than working with people, but objects are also less compelling. It’s down to you, the filmmaker, to create some interesting shots and make the entire affair engaging.

Under-cranking can be very handy here too. By filming some shots in a lower FPS, you can intersperse that footage with the stuff you filmed at normal speed to create some dazzling effects.

Here’s an example from a shoot I did at Soundstripe:

View this post on Instagram

Here's Soundstripe's filmmaker – the talented @ChrisHaggertyDP – giving us a behind the scenes glance at some product videography for @AudioTechnicaUSA. ⠀ Chris is implementing a masterful, spinning motion technique to help the headphones pop. Have you tried this trick before? ⠀ Track used is the brand new "Lentil Shanklet" by Isaac Joel. ⠀ #KeepCreating .⠀ .⠀ .⠀ .⠀ .⠀ .⠀ .⠀ .⠀ .⠀ .⠀ .⠀ .⠀ .⠀ .⠀ .⠀ .⠀ #Filmmaker #Filmmaking #MakingFilms #IndieFilm #IndieFilmmaking #FilmLife #FilmCommunity #FilmFeed #Filmmakers #FilmProduction #FilmCrew #KeepCreating #CreatorsOfInstagram #CreatorCommunity #Soundstripe #RoyaltyFreeMusic #StockMusic #BehindTheScenes #SideBySide

A post shared by Soundstripe (@soundstripemusic) on

As you can see, the camera movements are faster, and there’s a snap to them that you can’t get with a normal FPS. The under-cranking also brings a bit of inherent chaos, which adds some much needed drama to these shots.

These are only a couple of examples of how to use under-cranking. I’ve also used them in music videos to add a new dimension. This technique is great, because it doesn’t require a ton of heavy lifting in post production, and the style is unmistakable.

Given the focus on ultra slow-mo, under-cranking is a surefire way to make your next project stand out.


You might also enjoy this article about frame rates and shutterspeed.


This article was written by Chris Haggerty and Zach Watson. Chris is the resident filmmaker at Soundstripe, a royalty free music company. Zach is the content specialist.

Two 180s of Filmmaking—180 Degree Line & Shutter Angle

In the world of filmmaking there are two “rules” which each share the same name—the 180 degree rule. One has to do with the position of your camera with respect to your actors/subjects. The other has to do with the relation of shutter speed and frame rate. Both “rules” are established to improve the viewing experience of your audience.

I put the word “rules” in quotes because like every other rule, they can be broken—if you know why you’re breaking them and it serves the story. However, IMHO, I see a lot of newbie filmmakers breaking these rules because they seemingly don’t know. So, I wanted to give some insight on these rules and why you should keep them—and why (and when) you’d want to break them.

Don’t cross the line

The first 180 degree rule I want to discuss is the 180 degree line. It states that if you have two subjects speaking to one another in a scene, draw an imaginary line through the middle of them. At all times, you need to keep the camera(s) on the same side of the line. If you cross that line, you’ve “crossed the 180.”

The purpose of the rule is to keep the audience properly oriented. If actor A on the screen is looking from left to right, and actor B is looking from right to left, they will be properly oriented as long as you stay on the same side of the 180 degree line.

Here’s a clip from Ryan’s short “BALLiSTIC.” As you can see, both characters are oriented in a way that is natural and appears as if they are looking at one another.

Not crossing the 180 degree line

But, if for whatever reason, you move the camera around for another part of the dialog, and you cross that 180, then both actors will be looking from either right to left, or vice versa, as you cut back and forth. That will be off-putting to the viewer, making it appear as if they are looking in the same direction instead of at each other. Using the scene from above, if you crossed the 180, the shot could look like this:

Crossing the 180 degree line

But it’s not just narrative films where this rule applies. You can apply it to event video or documentaries. If you’re shooting a wedding, ideally you would keep the camera on the same side of the 180, using the bride and groom as the two subjects. If in a documentary where you have two people talking on a 2-camera shoot, keep both cameras on the same side of the 180 for the same reason.

Here’s a great Film Riot episode that effectively and quickly illustrates it:

Breaking the Rule

Many newbies break this rule because they simply don’t know or aren’t aware. Many experienced people even break this rule from time to time because they may have had so many camera changes or are trying to get interesting angles, they forget where the 180 degree line started. Having a dedicated script supervisor (the person in charge of keeping track of how actors deliver lines, where props were for each shot, etc.) can help.

It usually makes sense to break this rule if you’re in a situation (usually an event video like a wedding) where you are forced to stand or set up your camera in such a way that it breaks the rule.  Other than that, I can’t think of any other times I’d want to break this rule on purpose, unless for some reason I’m purposefully trying to disorient the audience. If you have ideas of when it would make sense to break this rule on purpose, hit us up on Twitter.

“Blurring” in the Line

The next 180 rule is the 180 degree shutter angle. I think most people break this rule because frankly, they just don’t know about it. I have to admit, until I started shooting with DSLRs way back when, and educating myself on how to properly shoot with then, I didn’t know it either. I knew what was considered the “normal” shutter speed setting for my camera (1/60 sec when I was shooting NTSC 29.97), but I didn’t know why. Hopefully this will give you some insight into this rule, as well as a better idea of when it’s a good time to break it, and when it’s not.

The Why—Proper Motion Blur

Plain and simple, the reason for the 180 degree shutter angle rule is to have proper motion blur. The rule states what your shutter speed should be set to relative to the frame rate of your camera. It’s very simple to figure out. Just double your frame rate. If you’re shooting at 30 fps, your shutter speed should be set to 60. [Note: this really represents the fraction 1/60th of second, NOT 60. But camera settings normally just use the denominator.

Also, as a side note, this 60 should NOT be confused with the 60i reference to a media format. When someone says they’re shooting in 60i, the “60” here actually refers to the number of interlaced fields. For every frame in a 30 fps shot, there are two interlaced fields, one odd and one even. So, for 30 frames, there are 60 interlaced frames, thus 60i. But that’s a blog post for another time.]

If you’re shooting at 24 fps, your shutter speed should be set to 48. However, many DSLRs don’t have an actual 48 shutter speed setting for video. So, use the closest one: 50. If you’re shooting at 60 fps, your shutter speed should be 120. And so on.

If your shutter speed is too fast or too slow, you won’t have proper motion blur. If it’s too fast, you get that staccato look popular in Ridley Scott battle scenes in “Gladiator.” If it’s too slow, the footage will look very soft and dreamy.

Rules are meant to be broken…sometimes

Okay, here’s where I may ruffle some feathers. I cannot believe how many DSLR videos I’ve seen that totally throw the 180 shutter degree angle out the window. Where it seems like every single shot is at a super high shutter speed. I see it a lot in the wedding cinematography industry, and I’m not sure why it’s so popular.

Having shot weddings for a number of years in my early days as a professional videographer, there were times when artistically a high shutter speed worked great. It’s popular to use on fountains to make the droplets of water look like diamonds falling. Or if the guests are throwing rose petals in the air, that high shutter speed staccato look can be cool. But I see it used for people just walking across the street, or hanging out in a bridal suite. For my taste anyway, it seems a bit overdone.

I know that in many circumstances, a high shutter speed is used when it’s particularly bright outside and the filmmaker is using a high shutter speed to compensate. A high shutter speed means less light is coming into the camera, and thus it’s a “trick” you can use if it’s too bright outside and you don’t have a neutral density filter to cut down the brightness. (Traditional camcorders have them built in, but for DSLRs you have to physically attach a filter). If you don’t have an ND filter, then ideally you should just stop down and adjust your aperture (i.e. instead of shooting at f5.6, shoot at f8, f10, or even–“gasp”–f16 or higher).

Now, I know precisely why DSLR shooters DON’T want to do this. The smaller your aperture, the deeper the depth of field (DoF), and heaven forbid if you shoot a DSLR with a deep depth of field. Here’s a newsflash people: not every single shot HAS to be a shallow depth of field.

Look at classic, timeless movies like “Citizen Kane” or “It’s A Wonderful Life.” They aren’t filled with a bunch of hyper-shallow DoF shots. In fact, many classic and contemporary films don’t use that hyper-shallow look. I know lots of DSLR filmmakers are just ga-ga over the shallow DoF you get with these cameras, but IMHO it’s way over used. There are other aspects of the visuals that will give it that “film” like look besides DoF (e.g. the color grading, composition, frame rate, etc.)

Here are some tips when I think it makes sense to break the 180 degree shutter angle rule.

  • Depth of Field: as I just mentioned, sometimes you’ll want to increase the shutter speed to help you attain a shallow depth of field. If it’s very bright outside, stopping up to f2.8 or f1.4 will totally blow out the visuals. Increasing the shutter speed will reduce the light and compensate for the brightness. Ideally, you should use an ND filter. But on the off-chance you don’t have any, this can work in a pinch. Just don’t go crazy.
  • Low Light: sometimes you may be in a setting where the light is pretty low and so using a slower shutter speed will let more light in. Depending on your camera, this will give your image more of a “dreamy” look. When I shot with traditional camcorders, I’d often shoot at 1/15 or slower because I wanted to get those dreamy streaks. I also used to shoot regularly at 1/30 at 30 fps instead of 1/60 because it gives a softer, more film-like look to traditional video. 1/60th has a very “video” look.
  • Epic battle scenes: if you’re shooting battle or fight scenes, you may want to use faster shutter speeds to get that staccato look (like the opening of “Saving Private Ryan.”)

If you have other examples of how you break this rule purposefully, and why, hit us up on Twitter.

Shutter speed experiment

Below is an example of where I used a high shutter speed for a very specific purpose. I produced a promo video for an amazing concert pianist in San Francisco, CA. For her promo she played the frenetic piece “Tarantella” by German composer Franz Liszt. The story behind the piece is that if you’re ever bitten by a tarantula, you have to do a crazy and hectic dance to rid yourself of the poison. I used a high shutter speed when recording part of Heidi’s fingers to 1) emphasize the frenetic nature of the piece, and 2) to make her fingers look like crazy tarantulas dancing on the keys.

Understanding Frame Rates vs Shutter Speed

Confusing comparisons

Frame rates vs. shutter speed. This is a topic worth addressing because I often hear beginning filmmakers make the comment, “I’m shooting at a 1/30 frame rate.” What they really mean though is shutter speed.

I totally get the confusion. There are so many numbers to keep in mind when filmmaking, and a lot of them look and sound the same: 24p vs 1080p; 1/30 shutter speed vs. 30 frames per second.  (And it doesn’t help that most DSLRs and video cameras just write “30” on the display, leaving out the numerator). How do you keep all this in mind? Why should you care? Well, I hope to quickly address that today. (Note: this won’t be an exhaustive post on the topic. But detailed enough to give you what you need to know.)

Setting the frame rates and the shutter speed on your DSLR.
Photo by JESHOOTS.COM on Unsplash


Frame Rates

As the name suggests, frame rate is how many frames per second your camera is recording. Traditional movie film is shot at 24 frames per second (fps). Although shooting at 24 fps is by no means the ONLY factor in determining a “film look”, it’s a good place to start.

Here’s a list of the most common frame rates you will encounter.

  • 23.976 (aka 23.98 aka 24): When you set your DSLR or video camera to 24 fps, you are actually recording at 23.976 frames per second. Believe it or not, it’s an important distinction. Here’s a perfect example why: I once had a project I was editing in Final Cut Pro 7 (years ago)  and my audio kept drifting (i.e. the audio in my media was coming out of sync WITH ITSELF!). For the life of me, I could not figure out why. It took me a month of research to finally find the answer (thanks to the amazing filmmakers on CreativeCow.net). FCP7 used the notation 23.98 in the program. So when I transcoded the footage (this was back in the day when that was necessary), I set the frame rate to EXACTLY 23.98. But what FCP was calling 23.98 was really 23.976. That minute difference between my EXACT 23.98 footage and the 23.976 sequence settings in FCP was causing the audio to drift in my project.
  • True 24 fps: some cameras, like the Canon EOS R, shoot at true 24 fps
  • 25: PAL, which is used in many European and Asian countries
  • 29.97 (aka 30 fps): NTSC, used in the U.S. and some European and Asian countries. Click here for a list of countries and their video format.
  • 30: In truth, 99.9% of the time when you hear or see “30 fps” it’s really 29.97. However, I remember when Canon came out with their 5D Mark II around 2008, it’s 30 fps was ACTUALLY 30 frames per second. It was rather frustrating, to be honest. Canon eventually “fixed” the situation and included a firmware update that set the 5D2’s “30” to 29.97.
  • 48: this is the infamous frame rate in which Peter Jackson shot “The Hobbit.” The overwhelming majority of professional and critical feedback I saw said it was not a look people liked.
  • 59.94 (aka 60 fps): this is double 29.97, and like the aforementioned frame rate, when you see 60 fps, 99.9% of the time it’s really 59.94. This is the frame rate you would shoot at if you want to create realistic slow motion (assuming you’re shooting at 24 or 30 fps). Editing 60 fps footage in a 24 fps project achieves a 40% slow-motion rate (24/60 = 40). This is always preferred to just slowing down your footage in your editing program because when you do that, the computer has to interpolate the difference and “add” extra frames. This can cause what’s often called “ghosting.” When you actually shoot at a higher frame rate and then slow it down, you get clean slow motion.


Accusonus
Sponsored ad by Accusonus.


A Note about iOS Frame Rates

It’s worth noting that the frame rates you see on iOS devices and apps (usually 30, 60, or 120 fps) are shot with a variable frame rate (vs. a Constant Frame Rate you get on traditional cameras). For that reason, the 30 fps, et. al., are target rates, and are not necessarily precise.

Frame rates on an iPhone
Photo by John Mark Arnold on Unsplash


Shutter Speed

Shutter speed relates to how slow or fast the shutter on the camera is opening/closing. The faster the shutter speed, the LESS light that gets into the camera. The slower the shutter speed, the MORE light.

For the most part, you will want to choose a shutter speed on your camera that is twice the frame rate (technically, it’s the denominator that is twice. So if you’re shooting at 24 fps, ideally you want to shoot at 1/48, or just 48 on your settings). This is called shooting at a 180-degree shutter angle. Suffice to say that you do this in order to achieve a “normal” motion blur. Shoot at a shutter angle above or below that, and you can get a weird look. Shoot at a higher angle and you get that staccato look (made famous in that glorious opening of  “Saving Private Ryan”). Shoot at a lower angle, you get a more dreamy look.

Note: since many DSLRs and video camcorders do not have a 48 shutter speed setting, you would set it to 50 (1/50th) to get as close as possible to a 180-degree shutter. Likewise, if you shoot at 60 fps, make sure to change your shutter speed to 120 (or the closest thing to it) if you want to maintain the 180-degree shutter at that higher rate.

Learn the Rules First, Then Break Them

All of this info is filmmaking basics. For some of you, it’s old hat. For others, it may be a breath of fresh air. Wherever you fall on the experience spectrum, it never hurts to go back to basics. And once you know them, then break the rules all you want for creative reasons.

If you have any good examples of when you’d break these rules and why, hit us up on Twitter and let us know.

More cinematography tips.

Header image by Julius Drost on Unsplash

The Candidate Short Film

I’ve watched this short film THE CANDIDATE probably 5-7 times over the course of the last few years and each time, my response is the same. It’s brilliant across the board. From the eerie tone, pulsing music, pacing, and the shot of him screaming in the bathroom is wonderful. It’s 20 minutes and it’s worth every second. I’ve marketed this short film to numerous filmmaker friends and I won’t stop now.

MATURE content: language

Directed by David Karlak
Written by Marcus Dunstan and Patrick Melton
Director of photography Brandon Cox
Score by Zack Hemsey
Produced by Marcus Dunstan, William Morse, and Ryan Harvie

CAST
Tom Gulager
Robert Picardo
Meghan Markle
P.J. Byrne
Thomas Duffy
Vyto Ruginis

Cinematography Tips from Bradford Young

I’ve been a big fan of Bradford Young for a while now. His work on films like ‘Selma’, ‘Ain’t Them Bodies Saints’ and ‘A Most Violent Year’ are all standouts and absolutely gorgeous.

Then there is my personal favorite, ‘Arrival’. That film blew me away on every level, especially Young’s visuals…

So, you can imagine my excitement when I found these short interviews with Bradford from CookOpticsTV. In them, Bradford gives tips on using practicals, negative fill, and bounce. He also briefly goes into staying flexible while working on a production that has huge changes, like replacing directors in Solo.

Find more from CookOpticTV on their YouTube channel.