Introduction
In Part 1 of this series, we covered the basics of human vision, gaining a better grasp of how our eyes work. This provides a great foundation for tackling today’s topic: camera basics and how they work.
But why should we care about this topic if our goal is to learn more about color grading? Can’t we trust manufacturers and cinematographers to worry about lenses, sensors, and the myriad technical details of a camera?
While it’s not necessary to become an authority on the subject, there are several excellent reasons for us to understand the mechanics of our cameras in greater depth:
- It allows us to think and grade photographically: By understanding cameras and the process by which images are captured, we can step in as colorists to enhance and complement this process, speaking and operating in the photographic language of light, exposure, ratios, and color temperature, rather than imposing graphical language and tools.
- It empowers us to separate hype from fact: With first-hand knowledge of the factors that go into capturing an image, we’re no longer forced to blindly accept the claims of camera manufacturers or other filmmakers. Instead, we can scientifically evaluate questions such as whether camera A truly has a superior resolution to that of camera B, or whether the latest sensor is really capable of capturing x stops of dynamic range. Armed with these critical tools, we can make the most of our images, and offer insight to our collaborators on the right tools for the job.
- The camera is one of filmmaking’s three essential ingredients: Despite the endless variations and evolutions in filmmaking’s tools and processes, there are three key constants in any workflow: the human eye, the camera, and the display. By deepening our understanding of each of these core ingredients, we lay a foundation that allows us to make quality technical and creative choices, regardless of the particular project we’re working on.
Now that we have a clear purpose to our mission, let’s dive into a better understanding of the way cameras convert light into stored images. We’re going to start with an overview of the camera’s key components.
Key Parts of the Camera and Their Function
The Lens
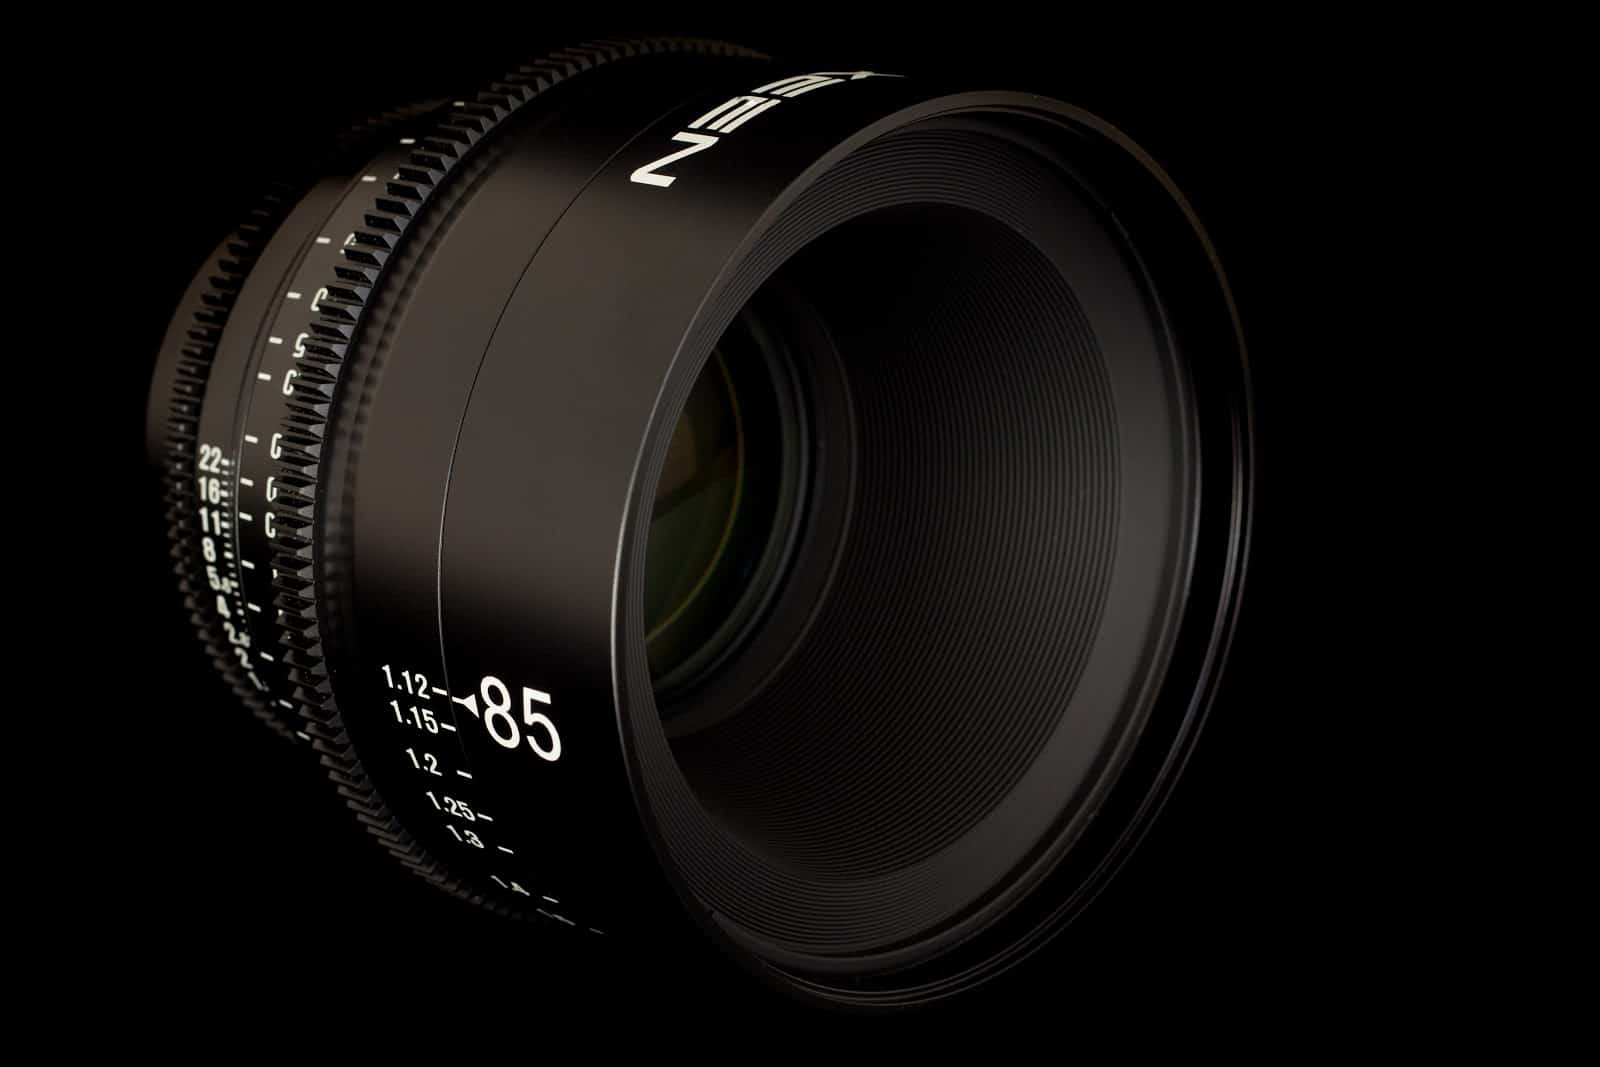
The lens of our cameras serves the same function as the lens of our eyes: it admits and focuses incoming light. As with our eyes, the lens has a variable aperture which expands or contracts to admit more or less light — a counterpart to the iris found in our eyes.
Despite similar terms and functionality, the camera lens differs from that of the human eye in a few important ways:
- A camera’s lens is often interchangeable, compared to the fixed lens of our eyes. Interchangeable lenses can differ from one another in terms of several objective factors, such as focal length, depth of field, and minimum/maximum aperture, as well as several subjective factors, such as contrast, sharpness, and bokeh (the way out-of-focus objects are rendered).
- The lens’ aperture can be automatic or manual, while our eye’s aperture is always automatic, constantly adjusting to our environment without conscious manipulation.
- The above point is also true of a lens’ focusing mechanism — this can be automatic or manual, compared to the fully automatic focus adjustments our eyes make as our attention shifts.
Sensor/Negative
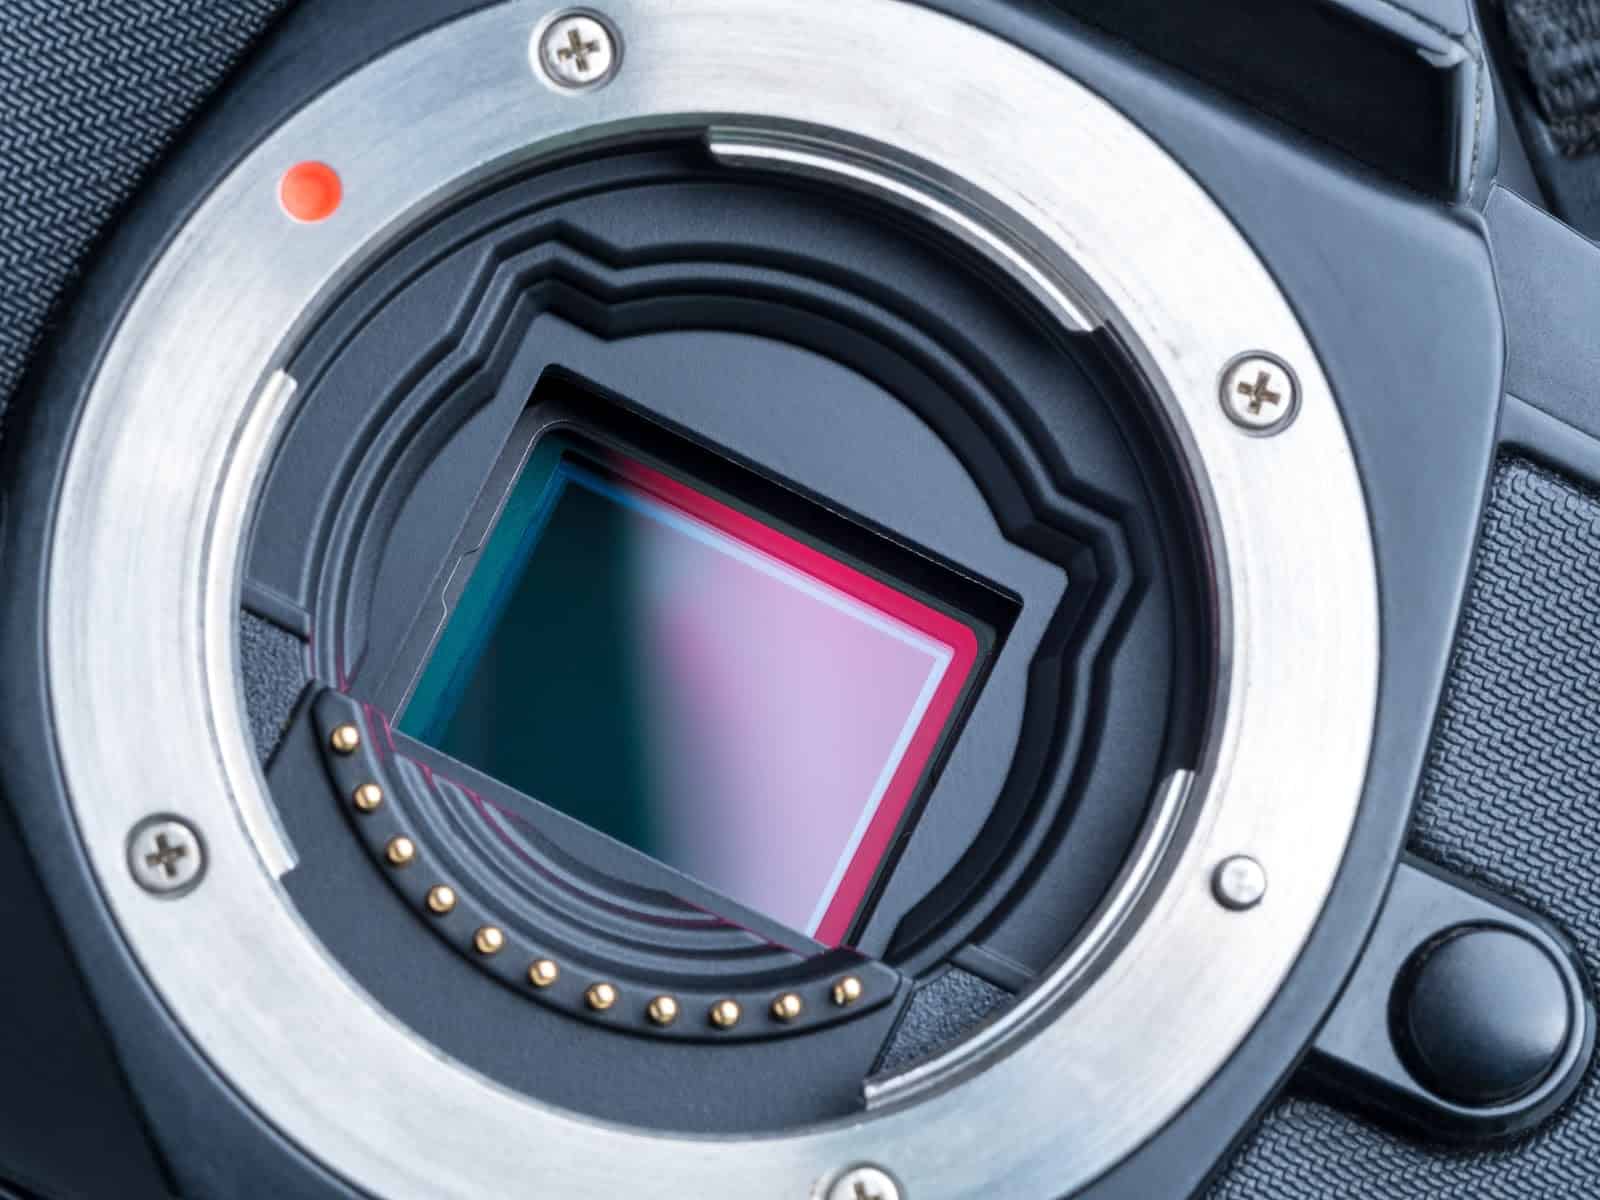
The sensor (or negative in the case of film capture) is analogous to the retina of the human eye: it is a light-sensitive surface which captures the focused image projected onto it by the lens. The underlying components of this surface can vary, but by definition it will always be some form of photosensitive device or material. Once captured, the image is either converted into an electronic signal, or, in the case of film capture, recorded directly on the negative before the camera’s motor advances to the next frame.
Processor/Encoder
This component and stage of the capture process varies in form depending on whether a digital or photochemical (film) capture system is being used.
In a digital capture system, the electronic signal produced by the sensor is next processed and encoded by the camera’s internal electronics. These steps can take a variety of forms, which can have a significant impact on the quality and character of the image. We’re going to discuss this in greater depth in the next section, but regardless of the specifics, the ultimate result is an image ready to be stored.
In a photochemical capture system, the sequencing and methods are a bit different, but the concepts are the same. The image is directly encoded to the raw negative, and later sent as an exposed roll to a laboratory, where it is chemically processed, resulting in a developed negative which, when printed to a positive film stock, produces a viewable image. As with digital systems, the amount and type of processing that takes place at the lab stage can vary considerably, and can have enormous impact on the quality and character of the image.
SSD/Magazine
This is another component and stage of the process which differs between digital and photochemical capture.
In a digital system, the processed and encoded image is digitally stored onto a hard drive connected to the camera. This drive (or digital magazine) can be internal and fixed, or external and interchangeable, and can vary in terms of its capacity and write speed. As we’ll learn in the next section, these properties end up playing a key role in the amount and type of processing our image undergoes prior to being stored.
In a photochemical system, exposed film is re-spooled by the camera into its magazine until the roll is shot out, at which point it’s off-loaded in a light-proof changing tent into a canister sent to the laboratory for processing.
Key Properties of the Camera
Now that we’ve familiarized ourselves with the key parts of the camera, let’s discuss some of its key properties, and the impact they have on the image.
Sensor/plane size
The physical size of the sensor or film negative influences the captured image in a number of ways:
- Sensitivity. All other factors being equal, the larger the plane, the higher the light sensitivity, due to the greater volume of photosensitive material.
- Depth of field. All other factors being equal, as the plane size increases, the depth of field decreases, creating shallower focus.
- Noise. All other factors being equal, the larger the plane, the lower the noise.
Sensor and plane size can vary tremendously, from the ultra-tiny sensor in a phone camera, to a large format such as 65mm film.
Color gamut
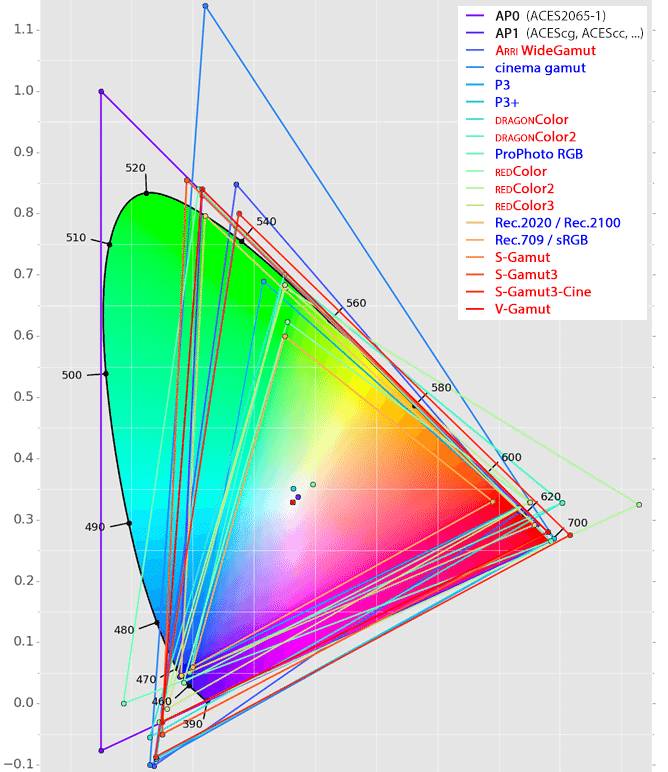
The color gamut of a camera is a way of measuring the full range of colors that it’s capable of capturing. This can range from smaller gamuts like sRGB (which might produce color clipping when capturing a traffic light, for example) to wide gamuts such as those found on Arri or RED cameras. Generally speaking, the larger the gamut, the more flexibility we have later — though as we’ll soon learn, larger gamuts come with additional responsibility as well.
This concept translates to photochemical capture as well, though the gamut tends to be less rigidly defined, and can vary not only between manufacturers and stocks, but between individual runs of the same stock, owing to the organic nature of the materials used.
Another way of thinking about a camera’s color gamut is in relation to the visible spectrum discussed in Part 1. Fundamentally, when we measure color gamut, we’re seeking to answer the question: How much of the visible spectrum is this device capable of accurately capturing?
Sensitivity
The sensitivity of a sensor or film negative refers to how much or little light is needed to create a healthy exposure. This is typically expressed in ISO for digital cameras, and ASA for film cameras, though the terms are interchangeable (meaning 800 ISO is equivalent to 800 ASA).
Dynamic range
The dynamic range (or latitude) of a camera expresses the maximum variation between light and shadow it can capture without clipping at either end, meaning an unrecoverable loss of detail. This is typically expressed in stops, and can range from 2-3 stops all the way to 20 or more. This concept corresponds to the dynamic range of our eyes as discussed in Part 1.
As with color gamut, we generally want to capture the largest dynamic range possible — provided we’re able to subsequently map and manage it, which we’ll return to later in this series.
Processing
The initial processing of an image plays a pivotal role in the process of motion imaging, whether in-camera (for digital sensors), or at a laboratory (for photochemical capture). On the digital side, camera manufacturers seek to perform processing which strikes a balance between reining in bandwidth and storage needs while preserving as much image quality as possible. This balance looks very different between consumer and professional devices. In consumer devices, the priority skews toward low cost, even if it comes at the expense of storing a larger, higher-quality image. In professional devices, the priority is on keeping processing to a minimum to afford maximum flexibility in post, but this creates the demand for more robust bandwidth and storage.
Accuracy
The accuracy or calibration of a camera refers to how faithfully it captures color. As a simple example, a camera in need of calibration might capture everything with a prominent magenta bias, skewing images away from the true wavelengths reflected at the time of capture. This factor is just as important as a large color gamut or broad dynamic range, because it may or may not be possible to fully and accurately compensate for poor calibration once images are captured.
Frame rate and shutter speed
Thus far in our series, we’ve mostly skirted around the “motion” aspect of motion imaging. Cameras capture still images in tight succession which are later reproduced, and the illusion of motion is provided by our visual system, owing to a phenomenon called persistence of vision. The rate at which these successive images are captured, and the length of interval in between, are known respectively as frame rate and shutter speed.
Frame rate and shutter speed, while related, do not have a fixed relationship to one another, and can both vary widely within and across different cameras, producing an equally wide range of subjective effects. For nearly a century, the gold standard for these attributes has been a 24 frame per second frame rate, and a 1/48 second shutter speed, but exceptions abound. Lower frame rate capture (in combination with 24fps playback) is used for timelapse photography, and higher frame rate capture is used for slow-motion, to list a few simple examples.
The maximum frame rate that a camera can record at is dependent on a number of the previously-listed factors, including sensitivity, processing power, and storage speed.
Closing
We’ve now covered the basics of both human vision and cameras, which comprise two of the three key ingredients in any filmmaking workflow. We’re now ready to talk about the third ingredient: displays, which will be the focus of our next installment in this series.
Once we’ve covered each of these three ingredients, we’ll be in an ideal position to understand the role color grading plays within the filmmaking process, and to discuss it in a holistic context.